Archive for the ‘Tapestry Crochet Design’ Category

Knot a Hat Thinking Cap

Friday, October 25th, 2013

You can find the pattern of my Thinking Cap in the 2014 issue of Crochet Accessories. I submitted photos of the red and white Knot a Hat (below) to Interweave. They sent me Pavlova and Kiwi colored Kenzie yarn to tapestry crochet the hat for them, then tweaked the name of the project.

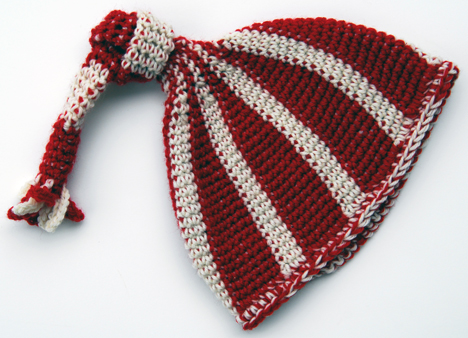
Red Tapestry Crochet Hat

Proposed Knot a Hat

This playful hat was inspired by the blue baby beanie (below) that Maarit Aalto gave me in 2005 at the Crochet Days Conference in Finland. Instead of starting at the top, crocheting begins at the rim. The rounds spiral around towards the top, so the tail can be as long or short as you wish!

Tapestry crochet hats

Tapestry crocheted hats begun at the rim.

This year’s edition of the magazine is full of other fun projects, too, so I hope you’ll take a look and give this knotty project a try!

Vogue Tote

Monday, May 13th, 2013

Have you seen the new Vogue Knitting Crochet? My tote is one of thirty four projects in the stylish 2013 special edition of the magazine. Members of Ravelry can see all the accessories, skirts, tops, and dresses here.

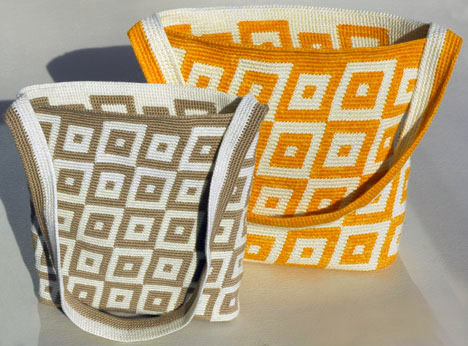
As usual, I experimented first. After finishing the brown and white bag, I emailed a project proposal with a photo to Vogue. They liked it – sent me a contract and several skeins of Prism Windward yarn – and voilá!

First and final version.

The first version is on the left, in front of the Vogue Knitting Crochet Tote on the right.

Their photo looks much better, don’t you think?

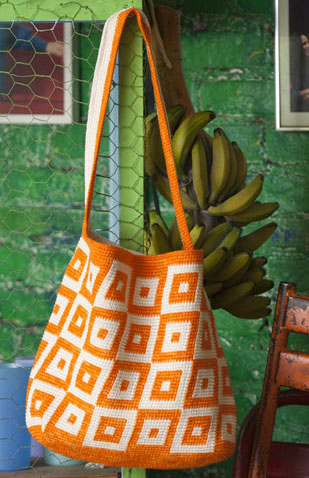
Tapestry Crochet Tote in Vogue

Tapestry Crochet Tote in Prism Windward and Windward Layers, Vogue Knitting Crochet 2013 (photo by Rose Callahan).

I hope you’ll take a look and give this project – and some of the others – a try!

Just in time for summer!

Kippot

Thursday, April 18th, 2013

Today I received this email that I thought you would enjoy:

“Many years ago, you and I corresponded. I had been looking for the key to incorporating different colors into kippot/yarmulkes, and had been asking people to teach me. Now one could. Finally, you introduced me to the answer…tapestry crochet! I had bought your first book on the subject and you sent me an autographed copy of the second. I think that crocheting patterns into kippot is more interesting than straight colors.”

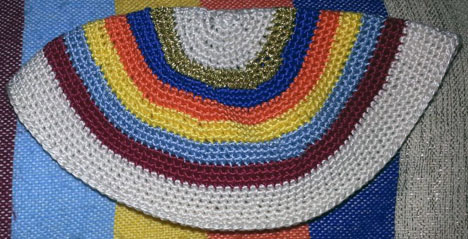
Kippa Monica Stripes

Monica’s kippa, tapestry crocheted with DMC.

“When I told DH I wanted to make him a kippa to match his tallit, he asked for a plain pattern. I matched the colors in the fabric with DMC skeins. I finished every color as if it were the outside of the kippa. I don’t like the ‘bump’ at the end of a row. (I will often incorporate the wearers Hebrew name so that the bump is woven in and not noticeable.) The gold thread was difficult to use which is why I put it on the inside, instead of the outside.”

“I actually had to unwravel the ecru outside band and redo it because the stitches were too tight for DH. He has a very flat head… LOL!”

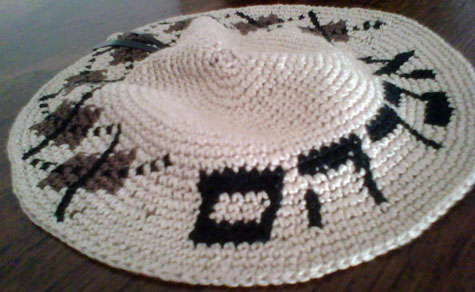
Kippot Monica

Three more of Monica’s kippot, two with Hebrew names and a feminine one with beads.

Here are details on the argyle kippah. I have a couple of books in Hebrew with lots of patterns. I usually make up my own.

Here are details on the argyle kippah. I have a couple of books in Hebrew with lots of patterns. I usually make up my own.

“I thank you to this day and wanted you to know that I’m still inspired.”

Thank you so much, Monica, for your wonderful email and for letting me share it with the world!

Bamun Inspiration

Tuesday, August 14th, 2012

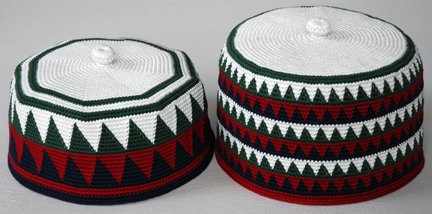
I never copy exactly what I see. That would be unethical and too easy. Instead, I prefer to challenge myself by reinterpreting motifs and designs. So when Interweave asked me to write about and design a Bamum hat, I looked through my collection, chose a style, and took it from there.

My first attempt (bottom left) turned out too small. The octagonal top was produced by increasing in the same spot each time. I didn’t like the way the wedges lined up with the motifs and they were too large to allow for slight size adjustments, so I made the next one (bottom right) with several improvements.

Bamun inspired hats tapestry crocheted with Cotton Classic by Tahki.

I was happier with the second hat – so that’s the one you’ll find in Interweave’s 2012 Crochet Traditions. The circular top was produced by making more random increases. The motifs are small, so the circumference and height may be subtly changed by increasing or decreasing the number of motifs.

I’m not saying that the first hat is awful. In fact, it’s included in the upcoming Tennessee Association of Craft Artists Biennial Exhibition at the Tennessee State Museum! More about that later.

Sunrise Afghan

Friday, June 29th, 2012

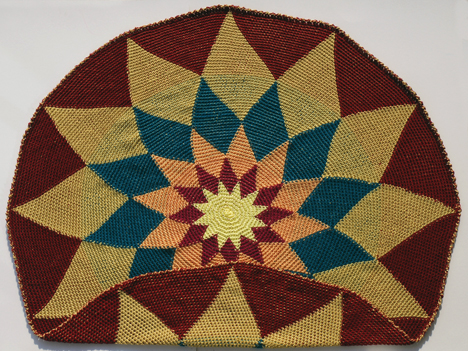
So, how did my Desert Sunrise Afghan end up in Robyn Chachula’s new Unexpected Afghans book? Well fortunately, she invited me to submit a proposal, explaining that, “The book will be a designer showcase of crochet through afghans.  We will be featuring 25 designers to showcase their craft through the medium of an afghan.”

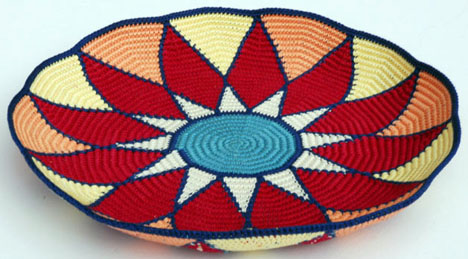
Robyn suggested I tapestry crochet a 48″ diameter sunburst, kind of like a Gothic stained glass window and my Sunburst Bowl, with colors inspired by the photo below:

Robyn selected seven colors of Caron Simply Soft yarn. She gave me the freedom to change them, but I decided to challenge myself with her selection. I eliminated one of the reds she sent, though, because it didn’t contrast enough with the other reds. The yarn and colors really took me out of my comfort zone – a good thing. I arranged them with high contrast in mind.

If you give this afghan a try, there is a mistake on page 80. The graph is great, but the color key on the right is incorrect. MC should replace A on the top, the pink square should be A instead of B, the orange square should be B instead of C, etc.

Robyn’s wonderful book includes twenty-eight other innovative afghans and five exquisite pillows, too! I hope you’ll take a look!

Happy Day!

Monday, January 16th, 2012


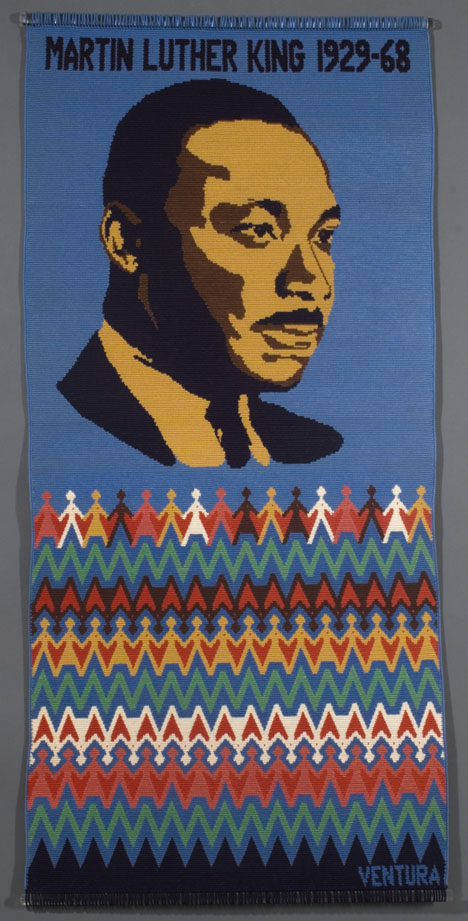
. . . I still have a dream . . . , tapestry crocheted cotton, 27″ x 56″, 1983.

The light blue background symbolizes water and green the land that both unite and divide us. The rows of people represent the different human races, which are all the same size – with their hearts in the same place. Large hearts form between them as they unite and hold hands in the top row.

While crocheting the figures, I deliberated about whose portrait to place above them. Who best promoted the idea of different types of people living and working together as equals in a peaceful world? After considering many famous mythological and real people, I realized it had to be Dr. Martin Luther King, Jr.

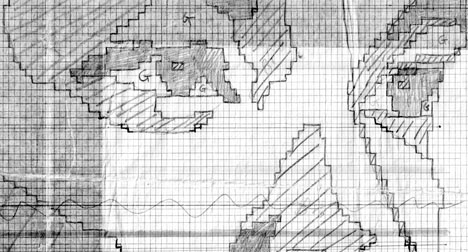
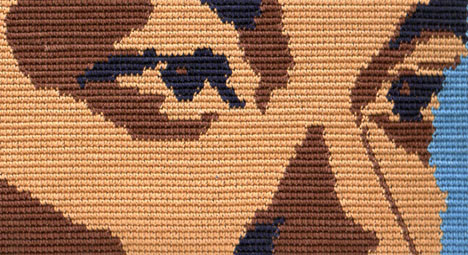
To design the face, I projected Dr. King’s image onto graph paper that I modified to accommodate the tall single crochet stitches.

The facial proportions were good, but the curves were not as smooth as they could have been. It was after this project that I designed tapestry crochet graph paper to better accommodate stitch shape and placement.

In front of the Lincoln Memorial in 1963, this great man shared his dream that “. . . all of God’s children, black men and white men, Jews and Gentiles, Protestants and Catholics, will be able to join hands . . .” This is my dream, too, that people around the world will learn not only to tolerate, but also to celebrate different points of view and beliefs.

Happy Martin Luther King Day! May it be peaceful and inspirational for you and the world.

Graphs from Photos

Monday, December 26th, 2011

There are many ways to make tapestry crochet graphs from photos. The ideal subject is lit from the side and includes several values. A variety of graph papers and information about how to use them are included in my Tapestry Crochet and More Tapestry Crochet books. In summary, the image may be projected onto paper or placed under tapestry crochet graph paper on a light table. After tracing the major lines, the cells are then colored in with light, medium and dark colored pencils.

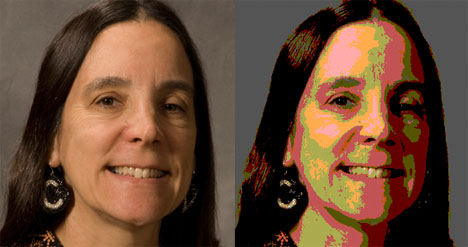
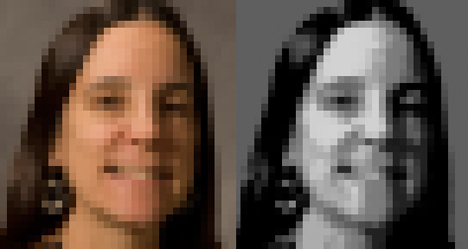
Another approach utilizes computer graphics. The below images were done in a just few minutes with Photoshop, but several other programs could have produced similar results. Reducing the colors of the photo helps visualize the crocheted version and often makes it easier to trace onto tapestry crochet graph paper.

The number of colors and the posterized colors themselves are easily changed in Photoshop.

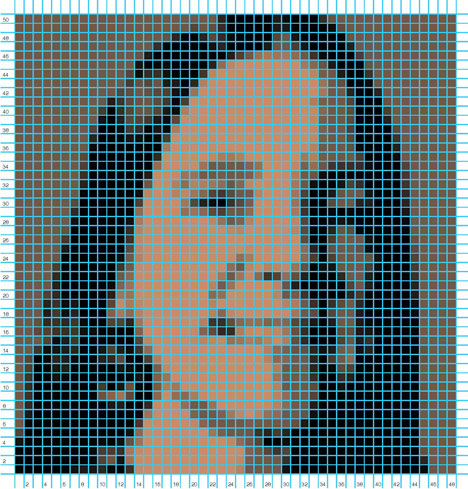
The online site, KnitPro, quickly (and for free) transformed my photo into a square-ruled graph.

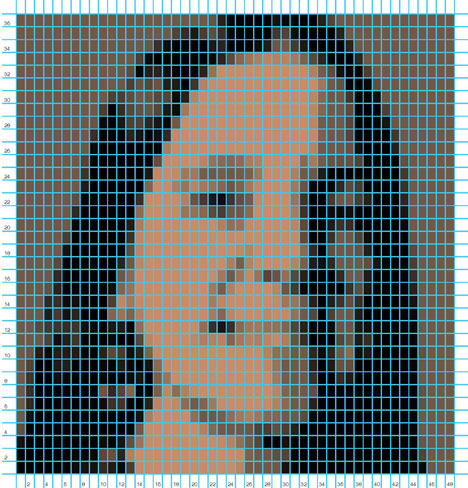
KnitPro just as easily produced the rectangle-ruled graph below.

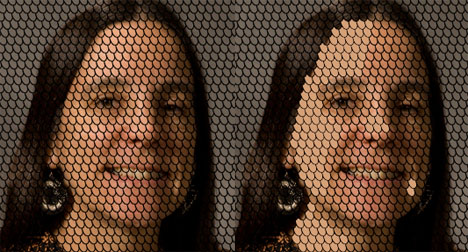
To my knowledge, though, there is no computer program available that will fill in tapestry crochet graph paper automatically. Digital versions of the most popular tapestry crochet graph papers are posted on the bottom of my tapestry crochet web page. The graph paper may be printed out, then placed over an image on a light table and filled in by hand or the graph may be digitally placed over a photo, then filled in (cell by cell) with the paint bucket tool.

For creating graphs of animals, flowers, etc., there are millions of free online images available for inspiration. For instance, Google “horse”, then click on “images” to find a profile view, then trace it onto the appropriate graph paper. This method helps achieve more accurate proportions and had I used one of those images, perhaps some of my horses would NOT have turned out like donkeys!

Shallow Single Tapestry Crochet

Wednesday, November 2nd, 2011

Ariana Thompson taught herself how to crochet more than fifteen years ago from the 1993 Harmony Guide To Crocheting: Techniques and Stitches by Debra Mountford. That’s where she discovered the shallow single crochet stitch. Fortunately, Ariana decided to experiment with this stitch while doing tapestry crochet.

According to Ariana, “The finished project does not behave like knitting – structurally it’s still single crochet, but the look is nice. It is actually a little firmer than regular single crochet, as you are working into the stitch below a little . . . deeper, I guess you could say. I think that’s why they call it ‘shallow crochet’, because you don’t actually gain as much height with each round as you would with a round of regular single crochet. It has a firmness that’s great for jackets, purses, pillows – with a finer yarn, like sportweight or sockweight you get a fabric than behaves like . . . maybe light denim. Shallow stitch has a significant bias and has to be wet-blocked to be straight, so I like to use a fibre that can be blocked – a wool or a cotton rather than acrylic.”

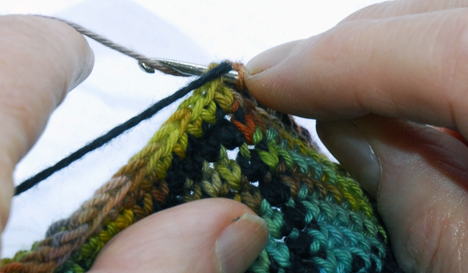
“I often do tapestry crochet using a ‘shallow single crochet’ usually abbreviated in patterns as ssc. Instead of working your single crochet into the top two loops of the stitch below, put your hook in the centre of the stitch below, between the two uprights. You have to work this stitch in one direction only so you always have the right side facing. The result is the perfectly stacked little “V” shapes of knitting.”

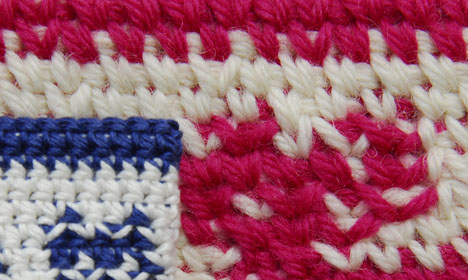
After Ariana shared her swatches with the Ravelry Tapestry Crochet Group, I began to experiment, too. Several attempts were required to successfully produce the red and white sample below – done with a large hook, loose tension, and stretchy yarn.

The motifs on my sample didn’t slant – maybe because the hook was stuck under the carried yarn of the stitch below.

I’m not only intrigued by the look of the front and back – but also by the incredible thickness of the fabric! To me, it looks like shallow single tapestry crochet has great potential!

Who knew?

Sunday, June 12th, 2011

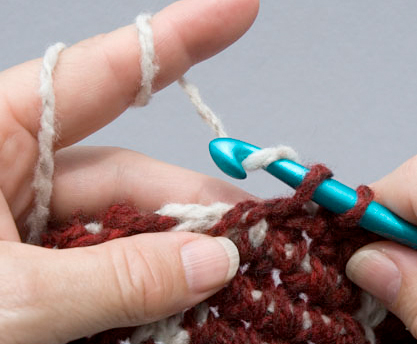
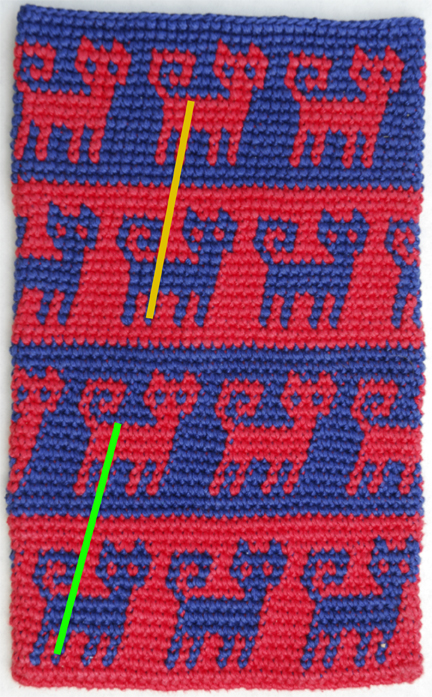
Yarn under the hook using Esther’s method . . .

. . . or yarn over the hook as usual?

Who would have thought that grabbing the yarn from the front or the back would make a difference?

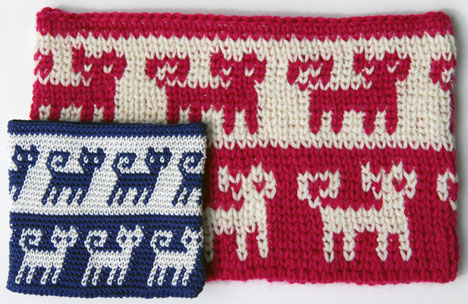
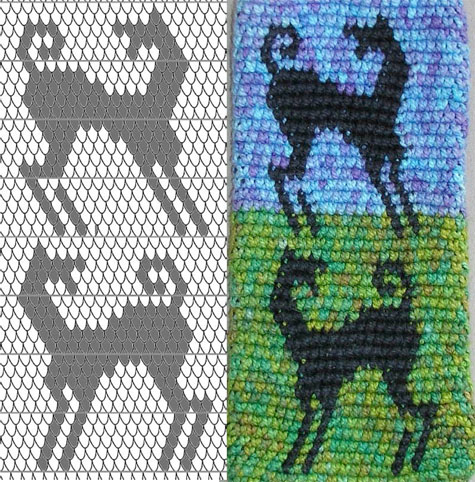
Not only does the design slant less with the yarn under technique, but there’s a sharper color transition. Less of the carried color is seen (especially where colors are changed) in the top two rows of cats. Why is that? Perhaps because the yarn twists slightly differently when yarning under.

If only I had paid closer attention in Guatemalan so many years ago! I always wondered why the motifs on their tapestry crocheted fabric slanted less than mine.

So now there’s a subtle additional tapestry crochet design choice! For tapestry crocheting zig-zags or the bottoms of hearts (where more of a slant is desired) then yarn over the hook. For less slant, yarn under!

More Amazing!

Wednesday, May 25th, 2011

I hate it that I’ve been too busy to blog, especially when there’s so much to share! Where to begin? Let me start with my trip to Asheville, NC, where I attended the WARP (Weave a Real Peace) conference in early May. It was exhilarating to be surrounded by so many inspirational women! Reconnecting with friends and making new ones was fabulous.

The day before leaving for Asheville, I realized that the amazing tapestry crocheter featured in one of my 2009 blogs lived there. So, I arranged to meet Esther at Earth Guild, where she works.

First she introduced me to her tapestry crochet hats. Esther is so creative and generous! For instance, she carries elastic in the last few rows for a better fit. What a great idea! (Esther’s pattern for the green and white pinwheel in the background of the picture below is part of her Tapestry Crochet Basics packet sold at Earth Guild.)

Esther also came up with a great way to carry both colors so that she can go back and forth between them without readjusting the yarns on her left hand between the changes. Tension is maintained by holding the yarns with the middle, ring, and little fingers of the left hand.

But the light bulb really went on when I noticed that her motifs don’t slant as much as mine. In fact, Esther made a special tapestry crochet graph paper with less slant.

What does she do differently? Let’s see if you can figure it out by looking at the photos below.

Did you see it? Instead of going under the yarn and grabbing it yarn from the back, she hooks it from the front! Eureka! I suspect that many Guatemalans tapestry crochet with Esther’s method because the motifs on most of the bags purchased down there do not slant very much. My next blog will explore these two methods more in depth.

You’ve probably also noticed Esther’s colorful yarn. Some of it is Earth Guild’s cotton Dragon Tail Yarn and the rest she dyes herself. Her hand painted yarns are sold at Earth Guild and her dying method is explained in her Tapestry Crochet: Basics, Bags, and Pouches packet sold at Earth Guild. It also includes stitch tutorials (her method for right and left-handed crocheters), patterns, design notes, several animal motifs, tapestry crochet graph paper, and tips.

My only disappointment is that I didn’t schedule enough time to look at more of Esther’s amazing tapestry crocheted works of art!

A Lovely Opportunity

Sunday, February 13th, 2011

If you have the courage to think outside the box, “mistakes” can open new doors – taking you to unimaginable destinations! That’s what happened to Connie Worley of Toccoa, Georgia, when she tried to tapestry crochet the pillow below.
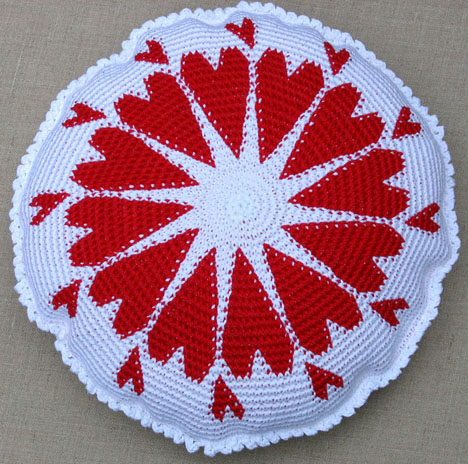
Tapestry Crochet Round of Hearts Pillow.

Connie explained, “I’m not real sure what happened . . . it was supposed to have been a pillow but that wasn’t working out . . . I misread the pattern and added an extra row between each row of increased stitches. Carol answered my e-mails immediately with suggestions. The best advice was from a former teacher of hers, ‘There are no mistakes . . . only design opportunities.’ So I took this ‘opportunity’ and turned the pillow into a small market bag.”
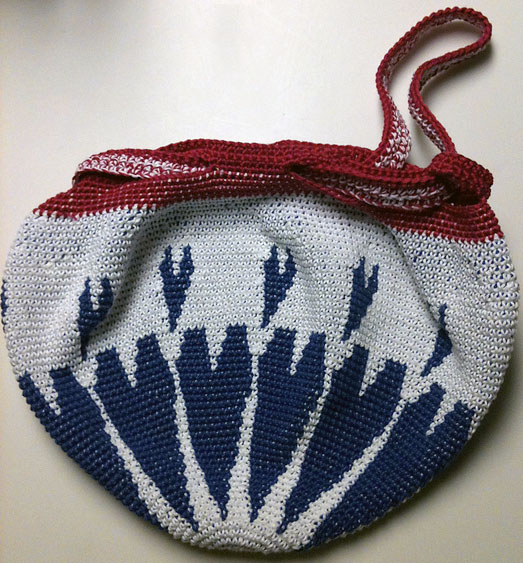
Just in time for Valentine’s Day – Connie’s Pillow Bag.

“I am happy that the ‘pillow bag’ turned out . . . even my 13 year old nephew exclaimed (unbidden), ‘That’s a really cool bag, Aunt Connie.’”

“The first time I saw tapestry crochet was in the Spring 2009 issue of Interweave Crochet, which featured the Spring Market Bag. I got stuck when I got to the top where you work the strap into the openings to make the drawstring. I was so impressed that I got an immediate response from Carol with an answer to my e-mail asking for help with links in the e-mail, which I followed. I followed the links to find out more about tapestry crochet and loved all of the designs. I ordered the pillow design at that time, but did not try to make it until this past January . . . my new year’s resolution was to do/finish some projects that have accumulated in the corners and closets of our house (much to my husband’s delight). The heart pillow was one of them.”
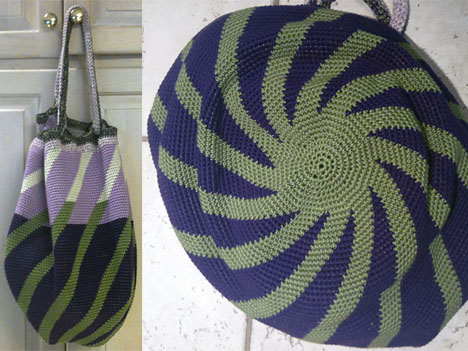
Connie’s Spring Market Bag.

“Last week I bought some more thread at Bumbleberry in Clarkesville, Georgia, to make the pillow . . . and I now have a great bag to carry the thread in while I’m working on it. I really do want to make the pillow to put on my daughter’s bed. I am using the blue thread because of a hand-made blue and white quilt that is on it. I plan to put an eyelet ruffle around the edge of the pillow with a blue and white gingham or calico on the back. I go to Bumbleberry every Tuesday with a great group of women. Mostly they all knit, but one lady who crochets and knits loved my Spring Market Bag and she is getting ready to make it for herself.”

“The Spring Market Bag does take a while to do. When I finished, I thought I would never make another one like it . . . but I recently bought more yarn (in teals and browns) to make another one.”

“I love the effect of tapestry crochet. When I finish the round heart pillow, the Handy Basket is on my to do list as well. So many patterns . . . so little time!”

I was wondering why Connie goes by connieocd on Ravelry, then I noticed the explanation. According to Connie, “When I make something, I go gangbusters and all I want to do is make that item, whether it is crochet scarves, quilling (not quilting, but quilling), scrapbooking, etc. My sister (jennylouhoo on Ravelry) says I should open up a craft shop and call it ‘Connie’s OCD Shop’ and stock it with whatever obsession I have at the time!!”
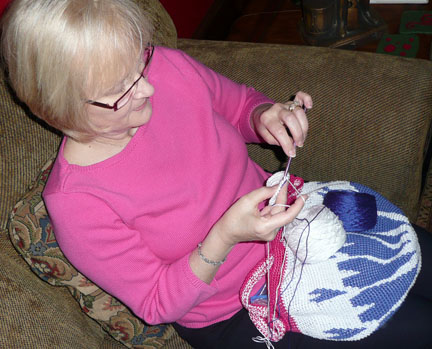
Connie is determined to make a pillow this time!

Did you notice that Connie is crocheting with her left hand? Although the pillow pattern is only available with right-handed instructions, some of my other patterns are written for both right and left-handed crocheters. They rarely sell, though, so I asked her if I should bother offering them.

Connie replied, “I LOVE it that you have the left-handed patterns. That is the version I ordered for the Handy Basket, so please keep them available. Generally, I don’t have trouble with patterns, but recently I wished I had had a left-handed pattern for a sweater I was trying to make. I can’t find the pattern for it right now, but it was made from the bottom corners up (diagonally). Putting it together proved too hard for my little brain . . . figuring out what was left, right, and which way the pattern was supposed to go . . . up, down. I gave up and went on to another sweater that had straight rows. Please keep putting the left-handed patterns on your web site.”

So, the moral of this story is: The next time you make a mistake and are tempted to frog it and start over, accept the challenge and design your own version of the pattern instead!
Felted Tapestry Crochet Bag

Sunday, January 23rd, 2011

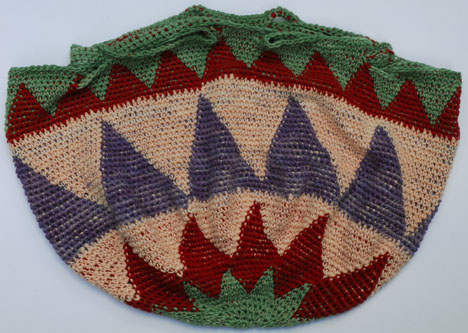
It’s always a challenge to design pieces for editors. How does it work? Well, they send out calls for specific types of projects for upcoming publications, then select the ones that best match their vision. Editors often tweak the proposal and usually choose the colors and yarn. That’s how it happened with this project, a “felted tapestry crochet bag with a simple geometric motif” for the February 2011 (issue 14) of Inside Crochet.

Some publications return the projects after the instructions have been published, others don’t. Most purchase all publication rights, others return the publication rights to the designer after a year or so. All of this is spelled out in the contract.

When the Manos de Uruguay Handspun Kettle-Dyed Wool arrived, the “voyage of discovery” began. The first step – what size hook? I tried several before selecting the size P (10mm) hook on the far right (below), because it produced a stitch that was tight enough to hide most of the carried yarn, but loose enough to produce a fabric that would felt in a washing machine.

Each of these swatches was crocheted with the same number of stitches, but different sized hooks.

This is how the bag looked before it was felted.

Tapestry crochet shrinks and felts like magic in a washing machine. Every yarn reacts differently, though, so the journey continued. Conclusion: this particular yarn needs to be washed a few times to felt sufficiently.

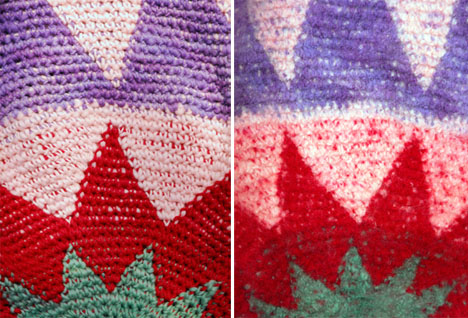
Details of before felting (on the left) and after felting (on the right).

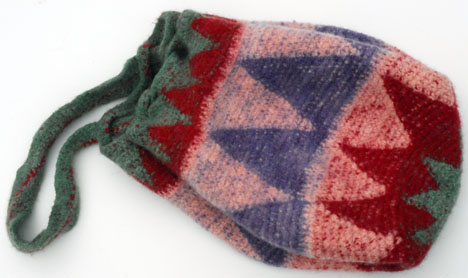
The fabric became very dense after it was felted – no lining necessary.

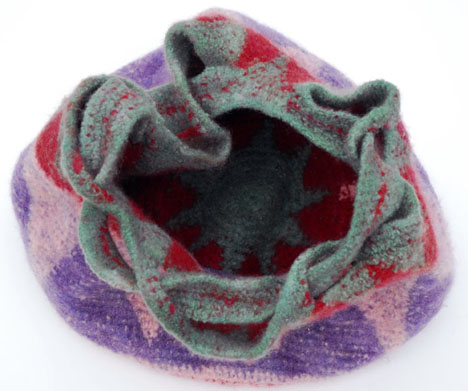
A lining would have hidden the pattern inside the Tapestry Bag.

Fortunately, I’m supposed to get this project back – along with the publication rights. I really like how the carried colors peek through the fabric, giving it a “tweedy” look.

So, what do you think?

Master Bag

Saturday, January 8th, 2011

I’m one of those people who prefers to sit in a window seat when I’m flying. It really paid off on the flight to the 2007 Crochet Guild of America Conference. When I saw the clouds against the brilliant, blue sky, I snapped a photo and thought, “My next piece will use these colors!”

THIS is why I prefer the window seat.

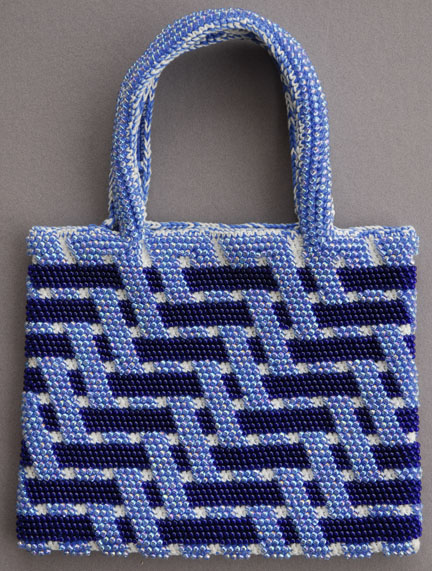
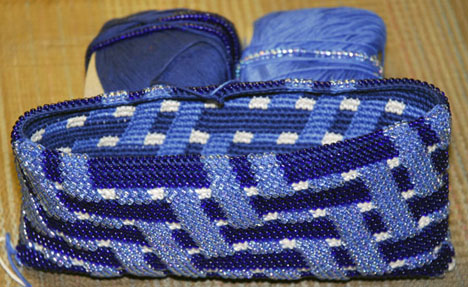
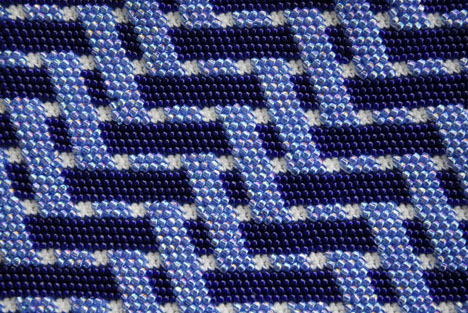
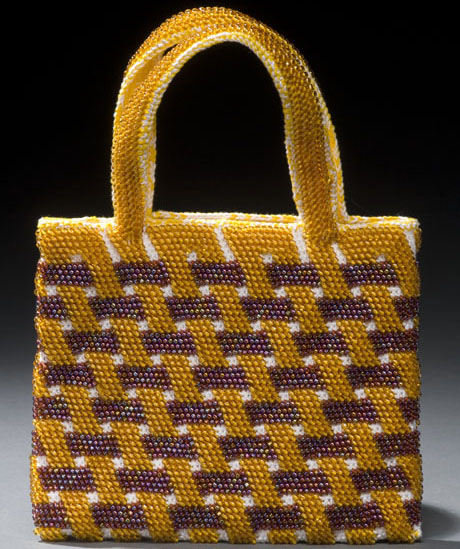
The bag below that I designed for the Crochet Master Class book is the result. This Beaded Tapestry Crochet Bag project combines my love of basket weaving with bead tapestry crochet. The two different sized beads and the motif trick the eye into thinking it’s looking at a woven surface.

Beaded Tapestry Crochet Bag project in Crochet Master Class book.

The beauty of tapestry crocheting with beads is that each thread can be loaded with one bead color and only the color that is needed at the time is crocheted to form a pattern while the other thread is carried. When crocheting with beads, the bead naturally slides to the back of the stitch, so the back of the stitch is on the outside of the bag. That’s why the graph in the book appears to be reversed.

The inside of the bag is the “working side” since the beads fall to the back of the stitch, so both the inside and outside look great!

This project was tapestry crocheted with three colors, but only one thread was carried while another was crocheted. Since every row only has two colors, ecru or navy was cut off and the other one added close to the end and beginning of each color section.

Detail of the Beaded Tapestry Crochet Bag.

Several years passed before the book was published (not unusual), so I was thrilled when it was finally released! What an honor to be included with such a talented group of designers!

This book is a real masterpiece!

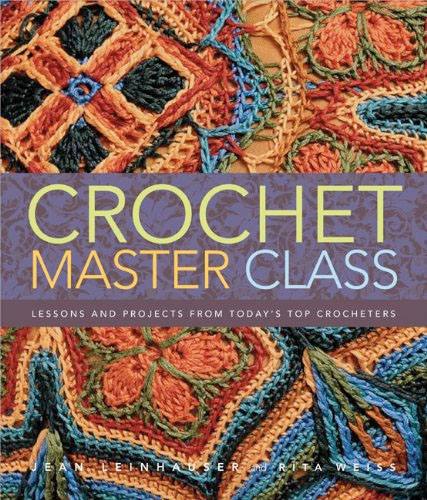
Crochet Master Class is not just a pattern book, but features eighteen crochet techniques. Jean Leinhauser and Rita Weiss, the editors, chose one designer to represent each different approach. We were sent questionnaires, then they put together the biographical, historical, and technical sections that precede each of our projects.

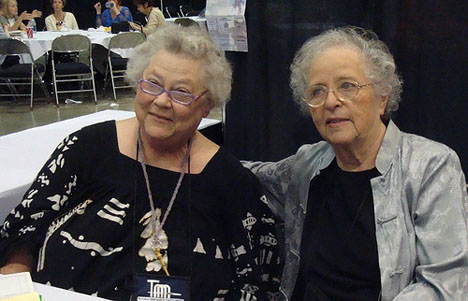
Jean and Rita at the 2009 Crochet Guild of America Conference (photograph by Sherri Bondy).

When I showed Jean and Rita the bag below at the 2007 CGOA Conference, they said it would be perfect for their “master’s level” book. Editors usually shy away from such complicated projects, so I was ecstatic that they were doing a book that would really challenge crocheters!

My first Bead Tapestry Crochet “Woven” Bag.

I later decided to redo the bag, though, with slightly different handles and motifs and with the colors I saw on the flight to the conference. Both of these master’s level bags were made with size 8 and 6 seed beads from Fire Mountain Gems and size 3 DMC 100% cotton Senso thread. As happens so often, this particular DMC thread has been discontinued, but other Senso threads or another size 3 thread could be substituted.

So, if you’re ready to expand your horizons, or would just like to learn more about the many faces of crochet, then Crochet Master Class is for you!

Geometry Tote

Monday, December 6th, 2010

I needed a sturdy oval based bag that would fit under an airline seat and would hide the dirt accumulated while traveling. So I packed some tapestry crochet graph paper, a pencil with an eraser, a size 00 steel crochet hook, and contrasting colors of #18 Omega Nylon in my travel bag so that I could work on it during my long trip to Africa.

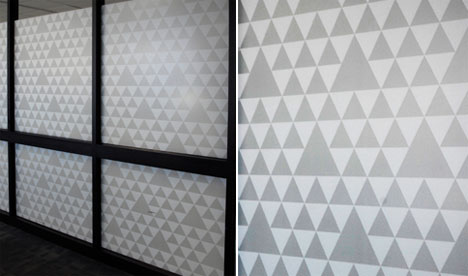
Looking around for inspiration at the John F. Kennedy International Airport Delta Terminal in New York City, I noticed a fabulous window at the gate where I was waiting for my flight to Ghana.

JFK Delta Gate Window
Window in the Delta Terminal at the JFK International Airport

Triangles work well for tapestry crochet, but I didn’t want to copy it exactly, so I drew several versions on my tapestry crochet graph paper, then asked some of the other passengers for their opinion. Fortunately, they all chose the one I liked best!

I counted the stitches across the bottom of the motif to figure out the number of stitches in each repeat, then did the math to figure out how many stitches were needed for the base chain.

After crocheting for hours (following the increases from one of my other oval-based bags) I put it under the airline seat in front of me to see how it would fit – and to my horror – the bag was too wide! So, I reluctantly frogged it and restarted with a shorter chain that would produce a narrower bag with less motif repeats.

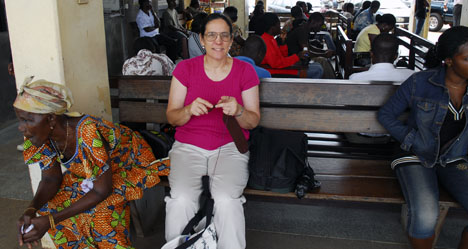
Carol in the Accra Bus Station
Crocheting the base of the bag at the bus station in Accra, Ghana, in 2009. I hadn’t slept for 24 hours and still had an 7 hour bus ride ahead of me!

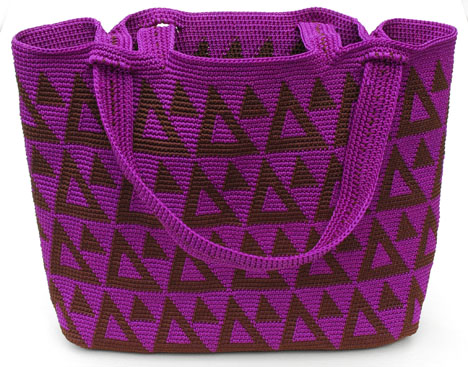
Tapestry Crochet Triangles Bag
The finished Geometry Tote, tapestry crocheted with Omega Nylon

I later realized that two of my older projects had similar triangular motifs – not the same – but almost! I’ll probably crochet a few more projects with more variations of these small and large triangles. The possibilities are (almost) endless!

The pattern for the Geometry Tote has just been published in the February 2011 Crochet World. I hope you’ll give it a try!

Ekaterina’s Shawl

Tuesday, October 19th, 2010

This shawl really brings me back! When I began crocheting flat pieces, I crocheted across, then cut the yarn; the same technique used for this shawl. In this case, the cut ends eventually become fringes.

The stitches on each row position themselves a little to the right, producing slightly angled sides. A parallelogram is perfect for shawls and scarves, though, but not good for rectangular wall hangings, so I eventually came up with a different technique for crocheting flat pieces with the “front” of the stitch always facing forward.

I began to crochet the shawl the day after the Dolce yarn arrived from Interweave – just 2 days before a school trip to Italy.  I finished it two days after returning home, right before the deadline.

I laid the finished shawl on a large beach towel on the floor, but noticed lots of ripples in the areas with little color changes, so I pulled on the carried yarns, where possible, to flatten it. Unfortunately, this adjustment made the shawl shorter than the require 70″ length stipulated in the contract. It was also 1/2″ too narrow!

First Version of the Interweave Tapestry Crochet Shawl
The first version of the shawl, crocheted with Cascade’s Dolce (blend of alpaca, wool, and silk).

Fortunately, I had enough Dolce left over to crochet another one. I emailed a photo and explained my dilemma to the editor and asked for more time. Granted.

For the next shawl, I switched to a larger hook, added stitches to make it wider, enlarged the inner rectangles, then eliminated the vertical stripe to make it easier to shape the shawl by pulling in the carried yarns from the ends right before blocking.

Interweave Shawl
The new and improved shawl!

Tapestry Crochet Shawl
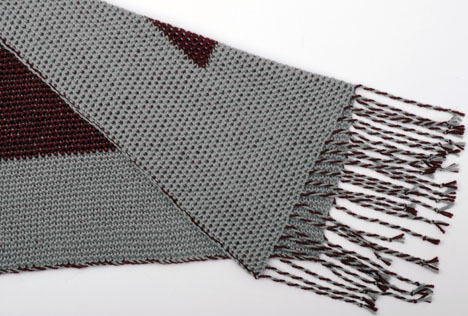
Detail of the shawl and fringe.

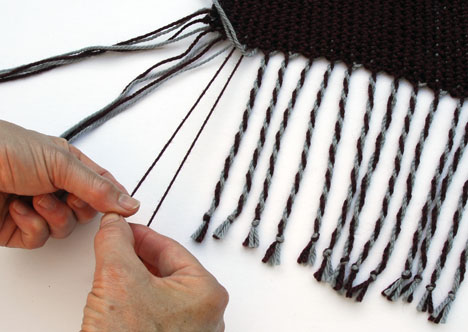
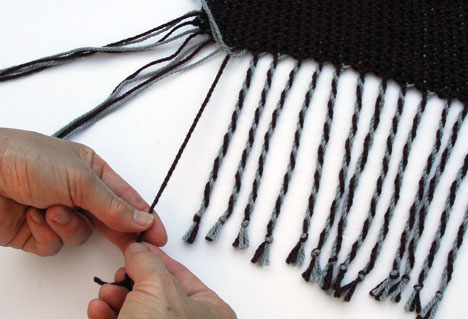
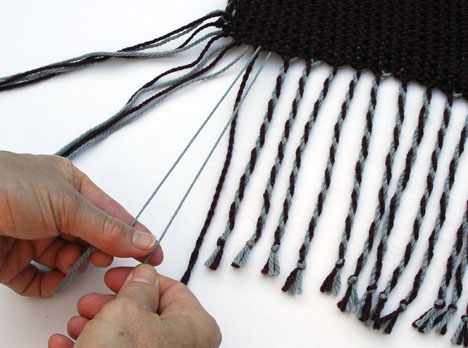
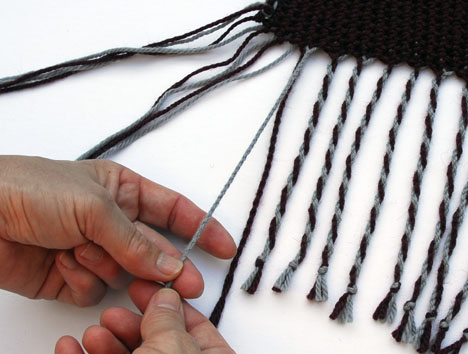
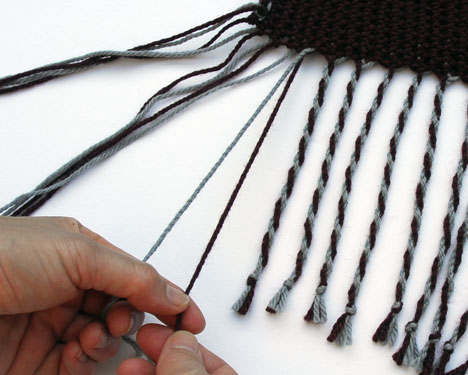
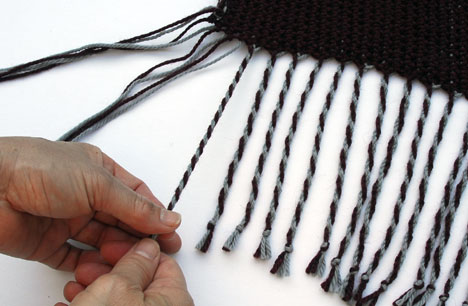
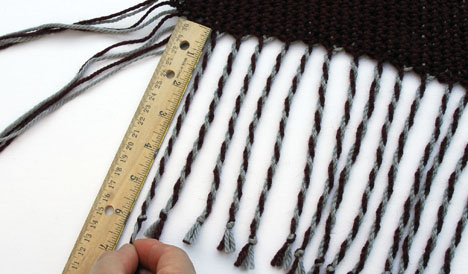
How was the fringe made? It’s plied by repeatedly twisting each yarn in the opposite direction several times. Just take a look below to see what I mean:

How to Make Fringe - Step A
Twist 2 neighboring yarns of the same color clockwise.

How to Make Fringe - Step B
Then put them together and twist them counterclockwise.

How to Make Fringe - Step C
Twist 2 more neighboring yarns of the same color clockwise.

How to Make Fringe - Step D
Then put them together and twist them counterclockwise.

How to Make Fringe - Step E
Retwist the two neighboring plied yarns counterclockwise.

How to Make Fringe - Step F
Then put them together and twist them clockwise.

How to Make Fringe - Step G
Make an overhand knot 6” from the shawl edge. Cut off the excess, leaving a 1” end.

Interweave dubbed it Ekaterina’s Tapestry Shawl. You can find the instructions in Interweave Crochet Accessories, a special issue of Interweave Crochet.

I prefer to crochet for relaxation at my own pace and submit the finished project for publication, but most editors prefer to choose the yarn and have tight deadlines, which stresses me out! What do you think? Was it worth it?