Shallow Single Tapestry Crochet

November 2nd, 2011

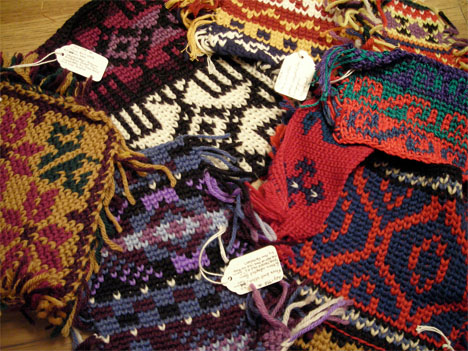
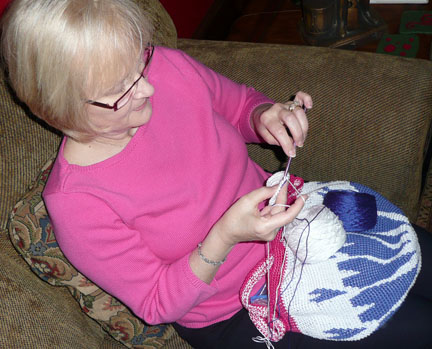
Ariana Thompson taught herself how to crochet more than fifteen years ago from the 1993 Harmony Guide To Crocheting: Techniques and Stitches by Debra Mountford. That’s where she discovered the shallow single crochet stitch. Fortunately, Ariana decided to experiment with this stitch while doing tapestry crochet.

According to Ariana, “The finished project does not behave like knitting – structurally it’s still single crochet, but the look is nice. It is actually a little firmer than regular single crochet, as you are working into the stitch below a little . . . deeper, I guess you could say. I think that’s why they call it ‘shallow crochet’, because you don’t actually gain as much height with each round as you would with a round of regular single crochet. It has a firmness that’s great for jackets, purses, pillows – with a finer yarn, like sportweight or sockweight you get a fabric than behaves like . . . maybe light denim. Shallow stitch has a significant bias and has to be wet-blocked to be straight, so I like to use a fibre that can be blocked – a wool or a cotton rather than acrylic.”

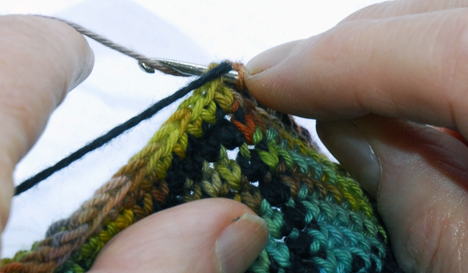
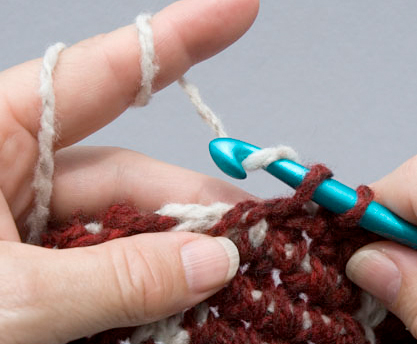
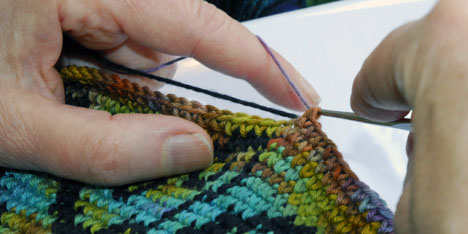
“I often do tapestry crochet using a ‘shallow single crochet’ usually abbreviated in patterns as ssc. Instead of working your single crochet into the top two loops of the stitch below, put your hook in the centre of the stitch below, between the two uprights. You have to work this stitch in one direction only so you always have the right side facing. The result is the perfectly stacked little “V” shapes of knitting.”

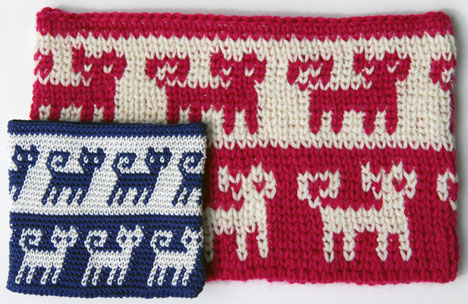
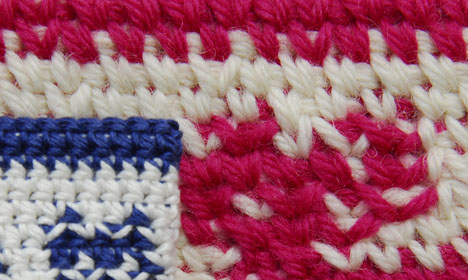
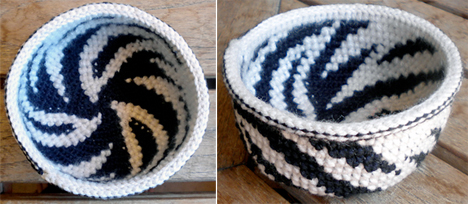
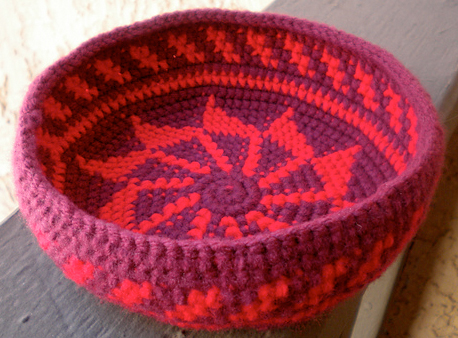
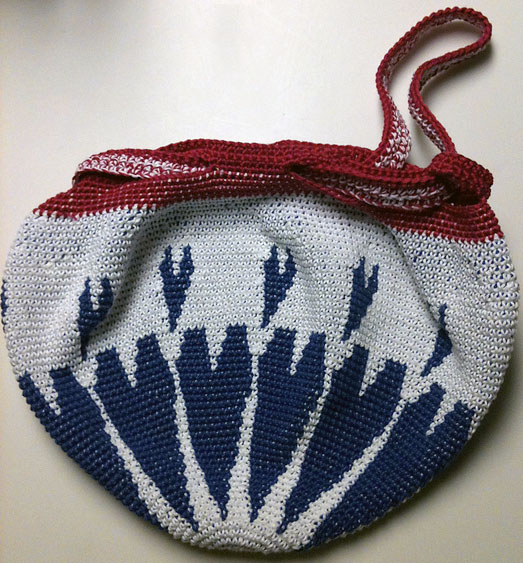
After Ariana shared her swatches with the Ravelry Tapestry Crochet Group, I began to experiment, too. Several attempts were required to successfully produce the red and white sample below – done with a large hook, loose tension, and stretchy yarn.

The motifs on my sample didn’t slant – maybe because the hook was stuck under the carried yarn of the stitch below.

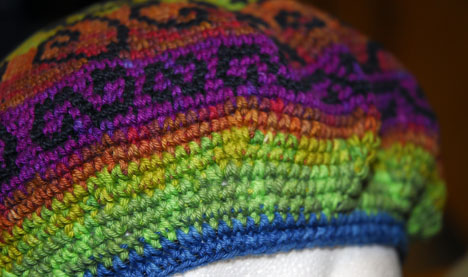
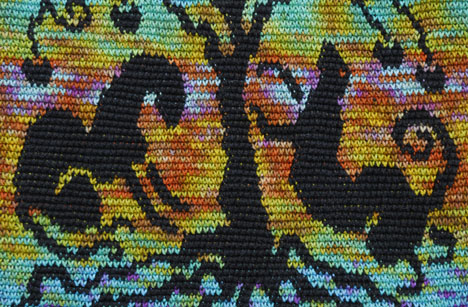
I’m not only intrigued by the look of the front and back – but also by the incredible thickness of the fabric! To me, it looks like shallow single tapestry crochet has great potential!

Out of Print – But Not Out of Style

October 21st, 2011

Tapestry Crochet was the first of three books that I wrote to spread the word about this fabulous technique. I couldn’t turn this out-of-print book into an e-book because the publisher owns the copyrights of the layout and graphs – but I own the copyrights of the projects and text.

After Interweave said I could republish the projects, I updated the text and redrew the graphs – this time making separate sets for right handed and left handed crocheters (the written instructions are the same for both right handed and left handed crocheters, but the photos and graphs are reversed).

My second book, More Tapestry Crochet, has expanded history and design sections, so I only concentrated on making the eight most popular projects available online, grouping them together by format.

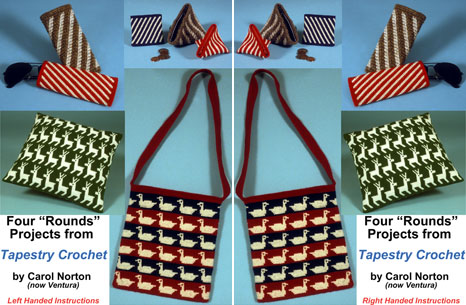
“Rounds” projects for left handed and right handed crocheters from Tapestry Crochet, 1991.

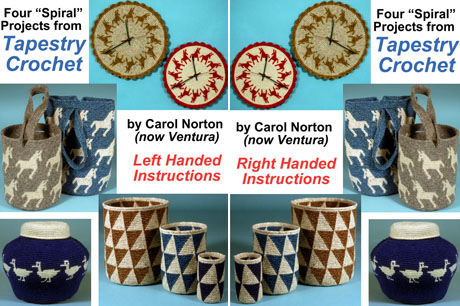
“Spiral” projects for left handed and right handed crocheters from Tapestry Crochet, 1991.

I actually wrote Tapestry Crochet in the early 1980’s, but it took ten years to get it published! Most of the other pattern books at the time featured expensive fibers, but my Mom and her friends preferred to crochet with inexpensive synthetic yarns, so I made most of the projects with their favorites to appeal to people like them. Unfortunately, most of those yarns are no longer made – but that’s the situation with many published patterns.

I’m an artist and art professor, so the projects were designed not only to teach the basics, but also to provide crocheters with fresh ideas and design tools. I try to encourage crocheters to tweak the patterns, but even when the instructions are followed to the letter, each finished piece is still unique because substituting yarns makes them that way! Links to the patterns are under the above photos of the projects.

What really amazes me when I stop and think about it, though, is that these pieces were crocheted 30 years ago – but they don’t look dated – at least not to me!

Down Under Wonder

October 9th, 2011

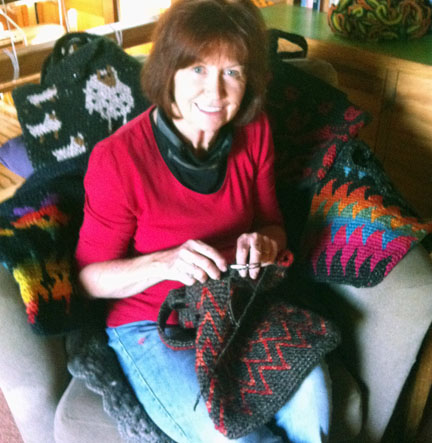
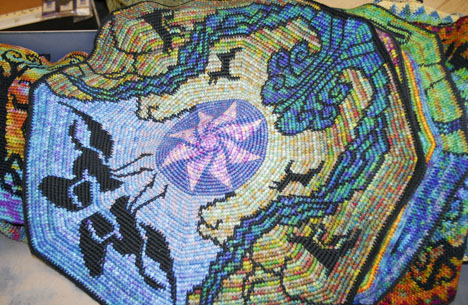
Anne Churches and her husband live in Kyabram, a small dairy and fruit farming community around 124 miles /200 km north of Melbourne, Australia. They retired around five years ago to part of the property that used to be their orchard. Anne enjoys golf, weaving, seeing her eleven grandchildren, and of course, tapestry crochet.

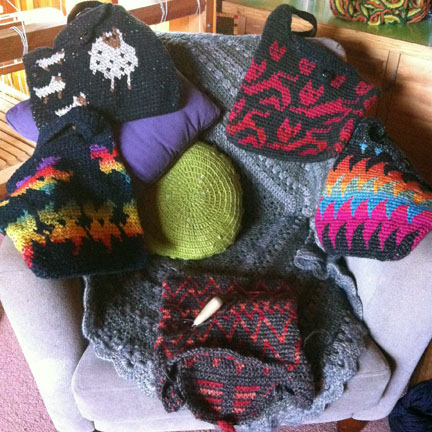
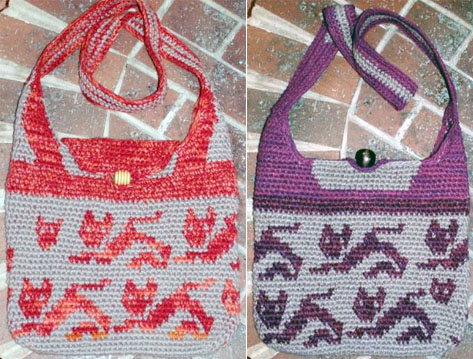
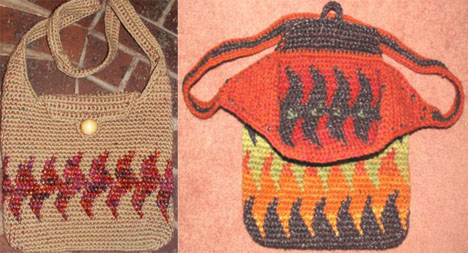
This talented artist has been designing and hand weaving stunning shaft shifting rugs on a large floor loom in her home for about ten years. While looking for something to do with the left over wool, she discovered tapestry crochet. As you can see, Anne’s unique sense of design and color have translated well. Over the past two years, she’s sold more than seventy tapestry crocheted bags at Wool Shows, Handweaver and Spinner Sharing Days, through her network of friends, and on her web site.

When asked what inspires her motifs, Anne said they develop as she explores the technique, adding that “I like free form shapes and also flowers. My most popular designs have been called ‘Organic’. A wonderful way to use up many colours.”

And how does she achieve the vibrant variegated colors? After purchasing New Zealand yarn from carpet manufacturers in Melbourne (similar to Jason Collingwood rug yarn), she dyes it with Lanaset dyes, 500 grams at a time in a 5 gallon / 19 liter stock pot on her kitchen stove. For the bags, she doubles the yarn and crochets them with a size G/ 7 / 4.5 mm hook with a wooden handle, specially made for her by a wood turner. Most of her bags are around 13″ 33 cm x 13″ / 33cm in size (not including the strap).

If you’d like to tapestry crochet one of Anne’s bags, you’re in luck, because the pattern for her Summer Bag (below) is for sale on her website. The instructions are clear and the pattern includes several stitch diagrams photographs. Anne plans to add more patterns in the future.

For hands-on workshops, Anne will be teaching how to tapestry crochet a bag in Kyabram and Wangaratta in October and November. Although students are not able to finish it during class, she shows samples of the base, the beginning of the sides, the strap, and the flap and tie and explains how to complete each step. So far, all of her students have finished their bags afterwards!

Anne says it best, “I never tire of making bags. Also I am forever developing new designs. I have found an activity that can go with me anywhere. You can’t weave a rug in the car!”

Just in time!

September 28th, 2011

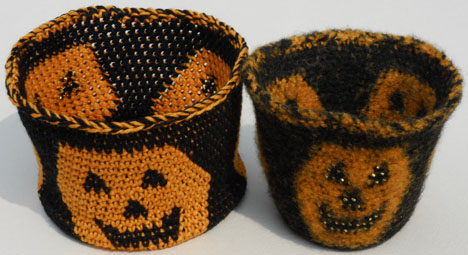
If you like to crochet loosely – then this bead felted Jack O’Lantern Basket pattern is for you. It’s tapestry crocheted with Plymouth Galway worsted wool and a size K hook. Size 5 silver-lined gold beads add sparkle.

Both of the below baskets were crocheted following the same instructions, but the basket on the right was felted in a washing machine. Loose stitches, feltable yarn, washable beads (the color washes off some beads), a HOT soapy wash and cold rinse are the keys to successful bead felting.

The Jack O’Lanterns are visible on the inside and outside! This online pattern is being sold by Ravelry for left handed crocheters and right handed crocheters – just in time for Halloween!

Online Vultures

September 13th, 2011

I put my vulture bag patterns on Ravelry, after Barb Holman sent me the wonderful wake-up call below.

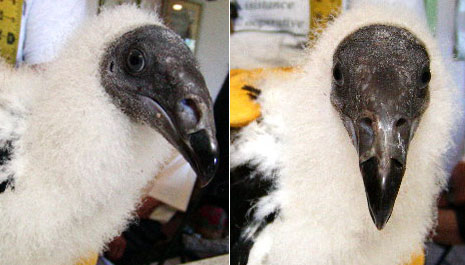
I admire them from afar, but Barb helps all sorts of raptors and knows a lot about them. The following may be more than you want to know, but I found it very interesting. Describing the photos, she said “Anyway, here is the only juvenile turkey vulture I ever rehabbed. I’ve rehabbed several rascally adults but this little guy came to us almost right out of the egg. I wish I had photographed him then because when they’re hatched all white soft fluff with that beautiful black head, and they’re rather nice to get along with. These photos show his black feathers coming in and his black head. Their heads turn red with sexual maturity.”

“I’m sure you already know these things but just in case … They keep cool by urinating on their feet. Early in the morning, they’ll gather in groups high up in the trees and turn their backs to the rising sun to warm up. They’re easy to recognize in flight by the dihedral (V) angle of their wings and silvery grey underside of their flight feathers. Most birds have no sense of smell which is why you can put a chick back into their nest without the parent noticing. Vultures hunt mainly by smell and can detect carrion far away.”

“They actually have very delicate systems and regurgitate their food at the slightest upset. Luckily, they’re not picky and will simply re-eat it. Disgusting to most people but, like all of nature, they serve the very important role of cleaning up.”

“As adults, they can be very dangerous to handle. I once read of a rehabber being killed when he held an adult vulture too close to his face and the bird reached up and bit his neck, opening his carotid artery. I was very accustomed to handling large birds of prey and trained several as education birds. My own bird, Luna, was a great horned owl I trained from nestling age.”

“I caught and handled adult vultures fairly often as well. They’re huge by comparison to all but eagles and condors and very strong. The big difference in safety while handling them is that other raptors use their talons as their main defense while the vulture’s feet and talons are relatively weak. Its that beak that you must be very aware of.”

“We have many eagles where I live now and yesterday, moved roadkill off the road so the feeding eagle wouldn’t be hit while enjoying his lunch. Beautiful birds and try as I might, didn’t get a good photo.  Also have vultures here … We’re at the top of a hill on a peninsula overlooking the Lake of the Ozarks and I love watching them circle, higher and higher in order to make it over our roof. We have often found as many as ten of them sitting on our deck rail discussing whatever it is that vultures discuss.”

“Being on the lake, the eagles come every year and a few winter over. We even have a nest not far away and have watched the youngsters fledge. A couple of years ago, we were down the hill on the bank of the lake. It was very cold and quiet and suddenly, almost in front of us, a gull swooped low and dropped a big fish. Right behind him, a huge eagle landed on the ice and took the fish. Behind her came a smaller male and a juvenile. They made no move to take the fish she had stolen from the gull and the gull just kept going. I’m assuming their sexes because, with raptors, the sexes usually look alike (no sexual dimorphism as with most other birds) and the female is half again larger than the male. An exception to this rule is the American kestrel. Its our smallest true falcon, the sexes are marked differently but about the same size.”

She sent the pictures because of my old blog post about the Carrion Bag.

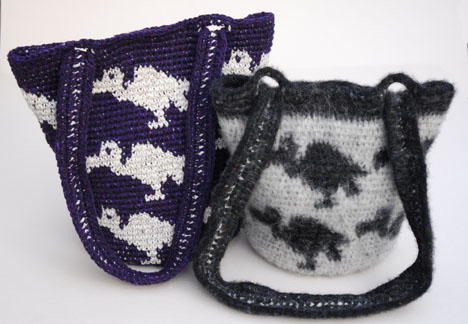
Vulture Purse and Carrion BagVulture Purse and Carrion Bag

You might already have these patterns because the Vulture Purse used to be available online, but was taken down when The Inside Loop went out of business. The instructions for the Carrion Bag are included in The Anticraft Book. Fortunately, I was able to keep the copyrights, which means that I can distribute these patterns myself. So the Vulture Purse for right and left handed crocheters and the felted Carrion Bag for right and left handed crocheters are now for sale – just in time for Halloween!

Free Wallet Pattern

September 2nd, 2011

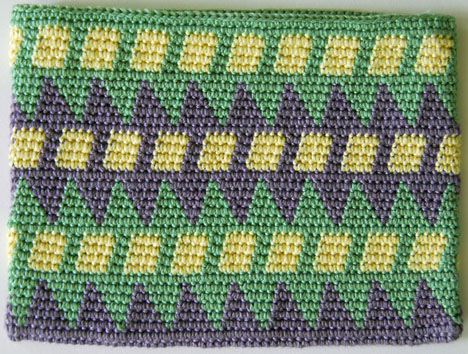
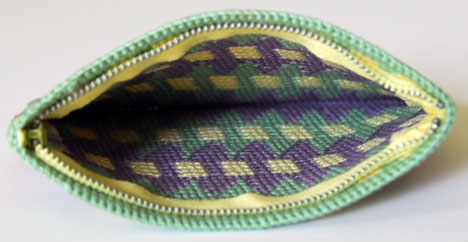
Crochet Today! just posted the pattern for my Tapestry Crochet Wallet as a free download. The November/December 2011 issue includes a picture and instructions for carrying and changing colors.

I didn’t want to line the wallet, so I tapestry crocheted it with Aunt Lydia’s Size 3 Fashion Crochet Thread and a size 1 (2.25mm) steel crochet hook with a handle to produce the dense fabric. A plain hook would have been OK, but the handle helped my wrist and hand work the tight stitches much more easily.

Even though three colors were used, there are only two colors in each round. The carried colors were switched five times in the solid rounds as needed.

A short zipper was not available locally, so I adapted a longer one from my sewing stash. (The pattern includes zipper instructions – how to shorten and sew it into the wallet.)

This project would be great for using up small amounts of left-over thread and yarn – just switch the colors more often and / or use more colors! What a wonderful gift idea!

I hope you’ll crochet this wallet for yourself or someone else – and fill it with all the money you save!

Drawn In

July 26th, 2011

I discovered Kathryn Kawasaki’s playful tapestry crochet bags and hats on the projects page of the Tapestry Crochet Group on Ravelry, where she goes by mrskawasaki. Her children’s drawings and friend’s requests inspired Kathryn to tapestry crochet several functional works of art! What follows are answers to my questions and descriptions of her projects on Ravelry.

When I asked Kathryn how she found out about tapestry crochet and where she learned how to crochet, she explained that “A few years ago, I saw a picture of one of your pieces with cats, and was very fascinated with the idea of putting a design directly into the fabric.  So, I bought your book, More Tapestry Crochet, to get that pattern, and for the paper to make my own designs.  I originally learned regular crochet from my (late) mom, but that was close to 40 years ago, and I’d forgotten all of it.  I did inherit two sets of her hooks, though.  I had to buy a book to figure out what I used to know – this was about four years ago.  I started with little animals (amigurumi?) and afghans, before branching out into tapestry crochet.”

And when I asked about her inspiration, she said, “Mostly I crochet because my children never seem to finish their activities at the same time, and I need something to do while I wait. I love being able to “draw pictures” on the cloth and to watch them appear as I work.”

“The tapestry crochet graph paper has been very, very helpful to me. I use a copy machine to make bigger sheets of it to make drawings with more pixels.”

“My daughter wanted a lunch bag with ‘a mouse and a long strap’.  She drew the picture on tapestry crochet graph paper, and I added the balloons to give it more height.  She used it for several months, but it was too small, so now the bag holds the clothespins when I go outside to hang wash.”


Mouse Bag, 5″ diameter x 8″ tall, 2009.

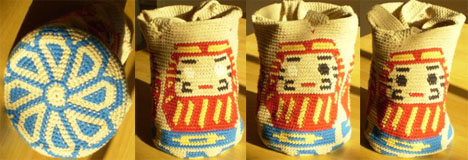
Kathryn made the bag below for her sister. “The picture is a Daruma, a Japanese goal-setting doll. The doll starts with both eyes white. One eye is painted in at the beginning of a project, and the other at the end. The base looks a little like a chrysanthemum.”
“My seven-year-old drew the faces on the special paper. I cleaned up her design, cleared out some leftover yarn, and my friend ended up with the “coolest lunch bag ever!” Win-win all around. :)”
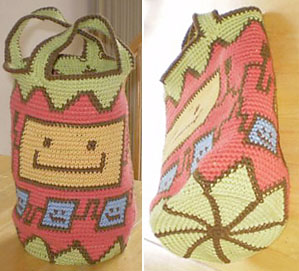

Square Faces Bag, Lion Brand Cotton-Ease, 6″ diameter x 10″ tall, July 2010.

“My friend’s niece is an acrobat in a circus (how cool is that?!), so my friend asked for a bag with circus elephants as a gift. There are six elephants altogether, but only pictures of four. Whoops.”
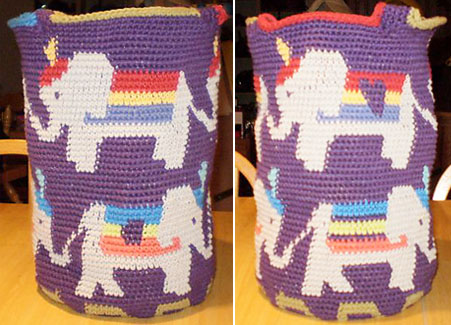

Circus Elephant Bag, Lion Brand Cotton-Ease, 7″ diameter x 11″ tall, August 2010.

“My neighbor told me one too many times that my bags look like hats. So I made him a hat. A really, really garish hat. With fake dreads. In the colors of his alma mater, the University of Tennessee. The brown hat was a test. I kept that one. And the children. I kept them too.”
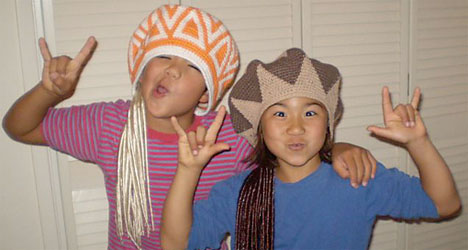

Bo and Jo model Orange and Brown Hats, Lily Sugar’n Cream Cotton, September 2010.

“These projects take fewer than 12 hours, so it’s usually only a few days.  Any longer, and the project becomes not portable.”

Kathryn made most of the Snowmen Bag below on a long car ride.
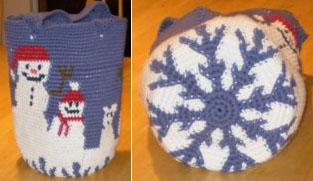

Snowmen Bag, Lion Brand Cotton-Ease, October 2010.
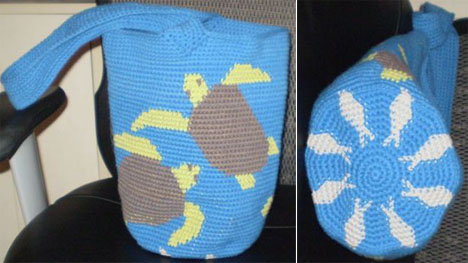

Sea Turtles, Lion Brand Cotton-Ease, November 2010.
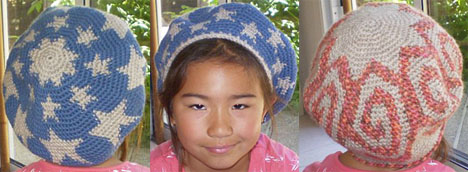

Rasta Hats, Lion Brand Fishermen’s Wool and Paton’s Classic Wool, December 2010 and June 2011.

“The bases of the snowman and fish bags are the same – kelp and snowflakes are different only in color!  Who knew?”
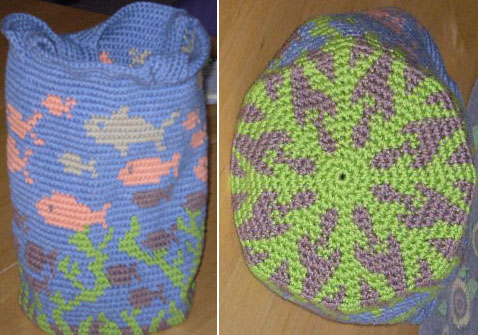

Fishy Bag, Plymouth Yarn Jeannee Worsted Cotton & Acrylic, March 2011.

“My ten-year old drew this for me. I like the fingers and how the alien’s eye moves around on its stalk. He didn’t want fingers on the lower limbs.”
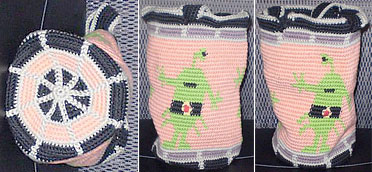

One Eyed Guy Bag, Plymouth Yarn Jeannee Worsted, 5″ diameter x 8″ tall, March 2011.

“Who knew orcas have a gray patch behind their dorsal fins? I sure didn’t. This bag was fun to make, but I had to add kayakers to make it tall enough. I like the high contrast of the colors.”
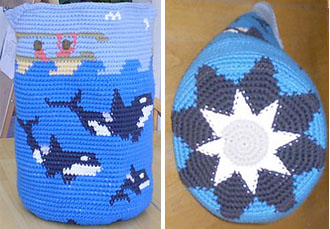

Orka and Kayak Bag, Lion Brand Cotton-Ease, 11″ high, April 2011.

“This is a (much) bigger version of the earlier circus elephant bag. It came out taller than I anticipated. Clearly, I need to plan ahead . . .  There are three rows of four linked elephants, with stars on half the blankets, and abstract designs on the others. The design on the base is because it’s easier to count to 18 eight times than it is to count to 144!”
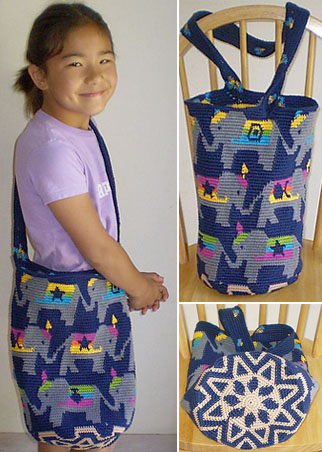

Mammoth Elephant Bag, Plymouth Yarn Jeannee Worsted and TLC Cotton Plus Solid Cotton & Acrylic, 6″ diameter x 14″ high, June 2011.

“A co-worker asked me to make ‘a tote bag that looks like Eddie Van Halen’s guitar’ . . . umm, okaayy . . . A tote bag in this fabric would weigh three tons, so I made him a “swatch pouch” about the size of an e-reader so he could see if he wanted to go that big. He’s decided against the tote bag. Now he wants a beanie ‘that looks like Eddie Van Halen’s guitar’. I took the picture before I added the button.”
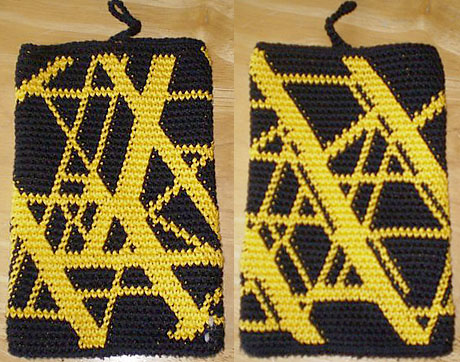

Eddie V Bag, Plymouth Yarn Jeannee Worsted, 6″ x 8″ tall, June 2011.

“Whew! My hands were able to save me from my big mouth – ‘sure, I think I could make a beanie that looks like Eddie Van Halen’s guitar . . .’ It was tricky making the stripes look random; I had to pay attention to where I put the increases. I made the top of the hat mostly symmetrical to keep the counting easier. I put his initials on the hat – looks kind of Van Halen-esque, no?”
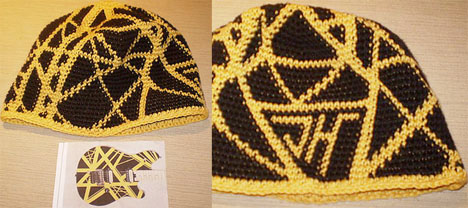

Eddi V Beanie, Plymouth Yarn Worsted Merino Superwash, July 2011.

“It was a fun project for a camping trip, but I had to keep it away from the campfire lest it get all smoky-smelling. My 10-year-old took the picture of me. Not too many chins. :)”
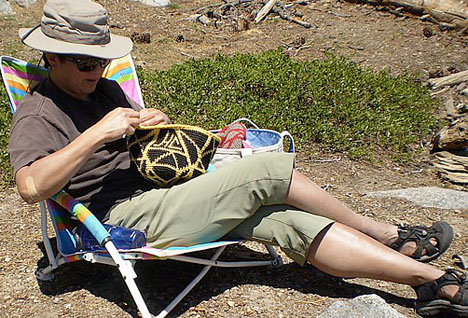

Kathryn busily tapestry crocheting the
Eddie V Beanie.

“What inspires me? The desire not to play with a phone to pass the time, I guess. I just like turning pictures into fabric. Deciding what to “draw” is the hardest part. (I seem to favor stuff with faces.) I am happiest when people give me ideas, for example: “Can you make an elephant?”

I really look forward to seeing what this creative mother and her two talented children from Campbell, California, do next! Don’t you?
Wendy Herdman

July 8th, 2011

Wendy Herdman, of Mesa, Arizona, is new to tapestry crochet. She says, “After several years hiatus from crochet, I stumbled on a reference to tapestry crochet while looking at painted thread techniques and the concept immediately made sense. Typically for me, I jumped into my yarn stash and started experimenting with all of three paragraphs “instruction”. Now that I feel comfortable with the basics, I’m looking forward to refining and expanding my skills.”

“I tend to work very organically with only a general idea of the finished project in mind. I don’t use published patterns or do more than rough sketches beforehand so my work is a constant process of finding solutions to problems I didn’t even know I’d be facing! That process–asking the questions, making mistakes, experimenting–constantly informs the direction of my work. Every piece begins with a single question: “What if?”

When I asked Wendy what she liked about tapestry crochet, she responded, “I love being able to change colors on the fly and even rip back huge sections without having to worry about stopping and starting new threads. It’s incredibly freeing.”

When asked, “What don’t you like about tapestry crochet?” She said,

“Having to stop to untangle the yarns! Working two or three colors at a time isn’t too bad, but when I get up to five or six I start seriously thinking about trading out a few colors to keep the numbers down.”

“My stash is mostly acrylic for economic reasons and for now that translates into a lot of Caron’s Simply Soft. I like the range of colors and the smooth feel, but I’ve been sneaking in more natural fibers and different weights of acrylic as well. In the end, anything that offers a good color or interesting characteristic to exploit is going to be a likely candidate for my work basket.”

None of her pieces are done with graphed images – but are made up as she crochets. To see more of Wendy’s fabulous original creations, take a look at her projects page on Ravelry, where she goes by wherdman.

And when asked, “Do you have any tips?” Wendy replied, “Play! Every now and then, throw away the patterns and the graph paper and just play. It’s good for the soul.”

Who knew?

June 12th, 2011

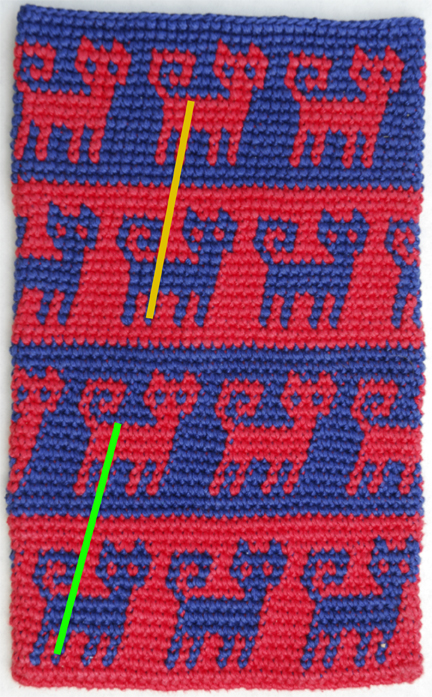
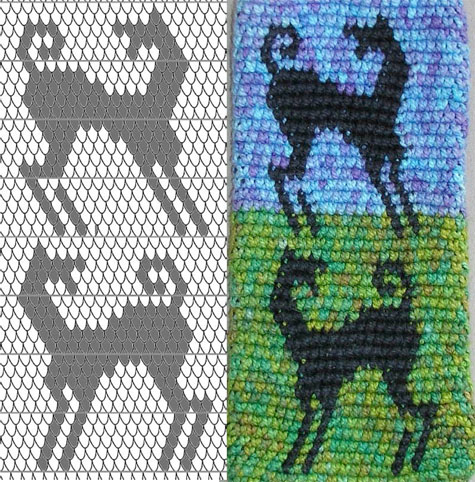
Yarn under the hook using Esther’s method . . .

. . . or yarn over the hook as usual?

Who would have thought that grabbing the yarn from the front or the back would make a difference?

Not only does the design slant less with the yarn under technique, but there’s a sharper color transition. Less of the carried color is seen (especially where colors are changed) in the top two rows of cats. Why is that? Perhaps because the yarn twists slightly differently when yarning under.

If only I had paid closer attention in Guatemalan so many years ago! I always wondered why the motifs on their tapestry crocheted fabric slanted less than mine.

So now there’s a subtle additional tapestry crochet design choice! For tapestry crocheting zig-zags or the bottoms of hearts (where more of a slant is desired) then yarn over the hook. For less slant, yarn under!

More Amazing!

May 25th, 2011

I hate it that I’ve been too busy to blog, especially when there’s so much to share! Where to begin? Let me start with my trip to Asheville, NC, where I attended the WARP (Weave a Real Peace) conference in early May. It was exhilarating to be surrounded by so many inspirational women! Reconnecting with friends and making new ones was fabulous.

The day before leaving for Asheville, I realized that the amazing tapestry crocheter featured in one of my 2009 blogs lived there. So, I arranged to meet Esther at Earth Guild, where she works.

First she introduced me to her tapestry crochet hats. Esther is so creative and generous! For instance, she carries elastic in the last few rows for a better fit. What a great idea! (Esther’s pattern for the green and white pinwheel in the background of the picture below is part of her Tapestry Crochet Basics packet sold at Earth Guild.)

Esther also came up with a great way to carry both colors so that she can go back and forth between them without readjusting the yarns on her left hand between the changes. Tension is maintained by holding the yarns with the middle, ring, and little fingers of the left hand.

But the light bulb really went on when I noticed that her motifs don’t slant as much as mine. In fact, Esther made a special tapestry crochet graph paper with less slant.

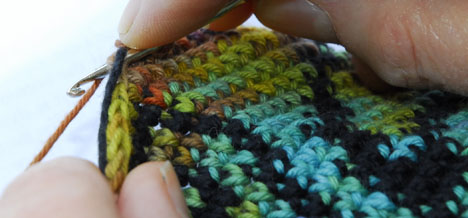
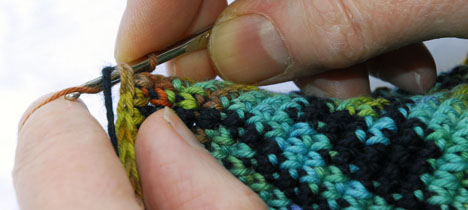
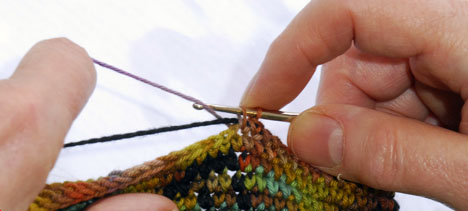
What does she do differently? Let’s see if you can figure it out by looking at the photos below.

Did you see it? Instead of going under the yarn and grabbing it yarn from the back, she hooks it from the front! Eureka! I suspect that many Guatemalans tapestry crochet with Esther’s method because the motifs on most of the bags purchased down there do not slant very much. My next blog will explore these two methods more in depth.

You’ve probably also noticed Esther’s colorful yarn. Some of it is Earth Guild’s cotton Dragon Tail Yarn and the rest she dyes herself. Her hand painted yarns are sold at Earth Guild and her dying method is explained in her Tapestry Crochet: Basics, Bags, and Pouches packet sold at Earth Guild. It also includes stitch tutorials (her method for right and left-handed crocheters), patterns, design notes, several animal motifs, tapestry crochet graph paper, and tips.

My only disappointment is that I didn’t schedule enough time to look at more of Esther’s amazing tapestry crocheted works of art!

Chattanooga Exhibit

March 7th, 2011

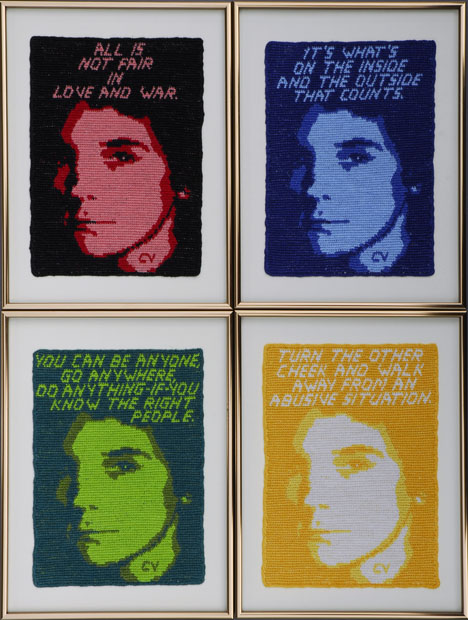
If you’re in southeastern Tennessee between March 28th and May 13th, please visit the Jewish Federation of Greater Chattanooga. Why? Because some of my tapestry crochet pieces have been included in an exhibit there based on the quote by Bertolt Brecht, “Art is not a mirror held up to reality, but a hammer with which to shape it.”

Four of the eight pieces of my Lessons Series included in the Drawn In exhibit.

Unfortunately, I won’t be able to make it then, but if you’d like to see my tapestries and meet the other artists in the exhibit, Judith Mogul and Frances McDonald, you’re invited to attend the reception on Thursday, April 7th, at 5:30.

The Federation is located at 5461 North Terrace Road in Chattanooga, TN 37411. The exhibit hours are Monday through Thursday from 9:00 to 5:00 and Friday from 9:00 to 4:00. It will be closed on April 19th, 20th, 25th, and 26th. All of their programs and exhibits are open to everyone, regardless of religious affiliation.

The curator, Ann Treadwell, said she was “looking for three different ways in which artists can be ‘a hammer’.  First through the use of words in decision making (Carol’s pieces); second in acknowledging the love for cars that shapes us and that we should push back (Judith’s work); and third the use of the artist as a “conductor” to engage others in the creative thought process and thereby change their lives (Frances).” For more about the exhibit, please contact Ann at atreadwell@jewishchattanooga.com or (423) 493-0270, ext. 13.

A Lovely Opportunity

February 13th, 2011

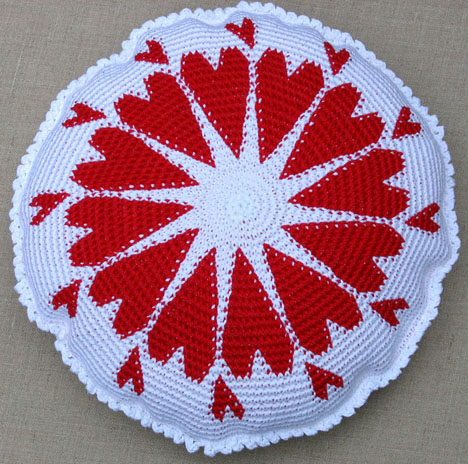
If you have the courage to think outside the box, “mistakes” can open new doors – taking you to unimaginable destinations! That’s what happened to Connie Worley of Toccoa, Georgia, when she tried to tapestry crochet the pillow below.

Tapestry Crochet Round of Hearts Pillow.

Connie explained, “I’m not real sure what happened . . . it was supposed to have been a pillow but that wasn’t working out . . . I misread the pattern and added an extra row between each row of increased stitches. Carol answered my e-mails immediately with suggestions. The best advice was from a former teacher of hers, ‘There are no mistakes . . . only design opportunities.’ So I took this ‘opportunity’ and turned the pillow into a small market bag.”

Just in time for Valentine’s Day – Connie’s Pillow Bag.
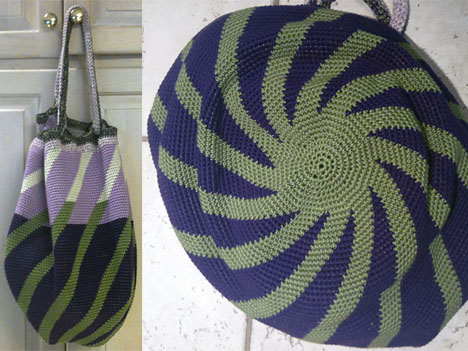
“I am happy that the ‘pillow bag’ turned out . . . even my 13 year old nephew exclaimed (unbidden), ‘That’s a really cool bag, Aunt Connie.’”

“The first time I saw tapestry crochet was in the Spring 2009 issue of Interweave Crochet, which featured the Spring Market Bag. I got stuck when I got to the top where you work the strap into the openings to make the drawstring. I was so impressed that I got an immediate response from Carol with an answer to my e-mail asking for help with links in the e-mail, which I followed. I followed the links to find out more about tapestry crochet and loved all of the designs. I ordered the pillow design at that time, but did not try to make it until this past January . . . my new year’s resolution was to do/finish some projects that have accumulated in the corners and closets of our house (much to my husband’s delight). The heart pillow was one of them.”

Connie’s Spring Market Bag.

“Last week I bought some more thread at Bumbleberry in Clarkesville, Georgia, to make the pillow . . . and I now have a great bag to carry the thread in while I’m working on it. I really do want to make the pillow to put on my daughter’s bed. I am using the blue thread because of a hand-made blue and white quilt that is on it. I plan to put an eyelet ruffle around the edge of the pillow with a blue and white gingham or calico on the back. I go to Bumbleberry every Tuesday with a great group of women. Mostly they all knit, but one lady who crochets and knits loved my Spring Market Bag and she is getting ready to make it for herself.”

“The Spring Market Bag does take a while to do. When I finished, I thought I would never make another one like it . . . but I recently bought more yarn (in teals and browns) to make another one.”

“I love the effect of tapestry crochet. When I finish the round heart pillow, the Handy Basket is on my to do list as well. So many patterns . . . so little time!”

I was wondering why Connie goes by connieocd on Ravelry, then I noticed the explanation. According to Connie, “When I make something, I go gangbusters and all I want to do is make that item, whether it is crochet scarves, quilling (not quilting, but quilling), scrapbooking, etc. My sister (jennylouhoo on Ravelry) says I should open up a craft shop and call it ‘Connie’s OCD Shop’ and stock it with whatever obsession I have at the time!!”

Connie is determined to make a pillow this time!
Did you notice that Connie is crocheting with her left hand? Although the pillow pattern is only available with right-handed instructions, some of my other patterns are written for both right and left-handed crocheters. They rarely sell, though, so I asked her if I should bother offering them.

Connie replied, “I LOVE it that you have the left-handed patterns. That is the version I ordered for the Handy Basket, so please keep them available. Generally, I don’t have trouble with patterns, but recently I wished I had had a left-handed pattern for a sweater I was trying to make. I can’t find the pattern for it right now, but it was made from the bottom corners up (diagonally). Putting it together proved too hard for my little brain . . . figuring out what was left, right, and which way the pattern was supposed to go . . . up, down. I gave up and went on to another sweater that had straight rows. Please keep putting the left-handed patterns on your web site.”

So, the moral of this story is: The next time you make a mistake and are tempted to frog it and start over, accept the challenge and design your own version of the pattern instead!

Felted Tapestry Crochet Bag

January 23rd, 2011

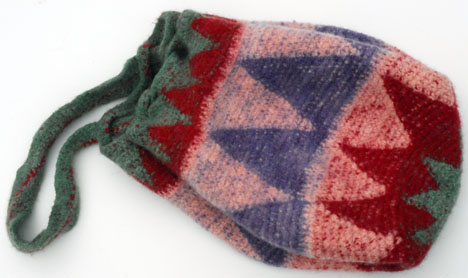
It’s always a challenge to design pieces for editors. How does it work? Well, they send out calls for specific types of projects for upcoming publications, then select the ones that best match their vision. Editors often tweak the proposal and usually choose the colors and yarn. That’s how it happened with this project, a “felted tapestry crochet bag with a simple geometric motif” for the February 2011 (issue 14) of Inside Crochet.

Some publications return the projects after the instructions have been published, others don’t. Most purchase all publication rights, others return the publication rights to the designer after a year or so. All of this is spelled out in the contract.

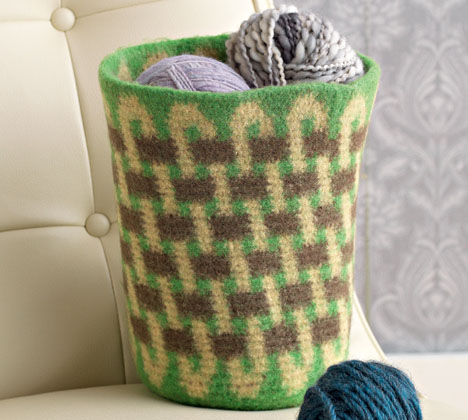
When the Manos de Uruguay Handspun Kettle-Dyed Wool arrived, the “voyage of discovery” began. The first step – what size hook? I tried several before selecting the size P (10mm) hook on the far right (below), because it produced a stitch that was tight enough to hide most of the carried yarn, but loose enough to produce a fabric that would felt in a washing machine.

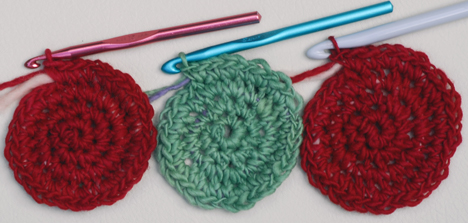
Each of these swatches was crocheted with the same number of stitches, but different sized hooks.

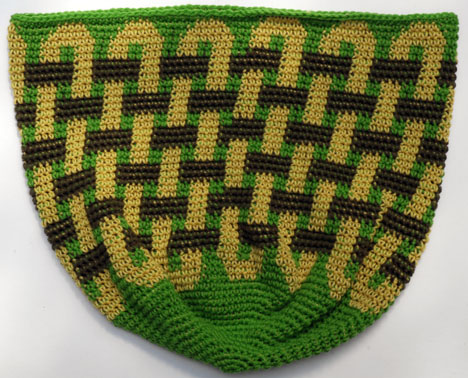
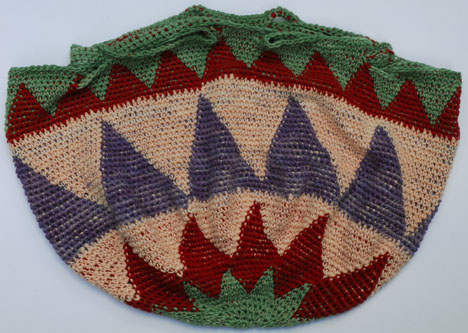
This is how the bag looked before it was felted.

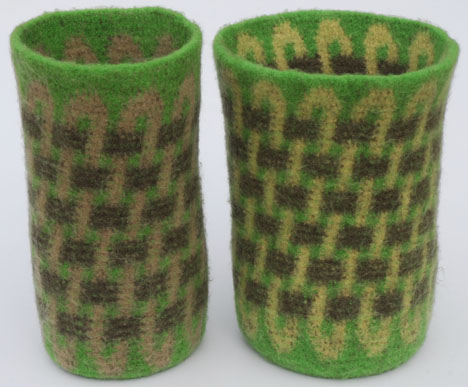
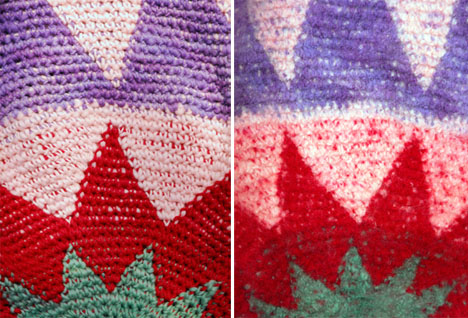
Tapestry crochet shrinks and felts like magic in a washing machine. Every yarn reacts differently, though, so the journey continued. Conclusion: this particular yarn needs to be washed a few times to felt sufficiently.

Details of before felting (on the left) and after felting (on the right).

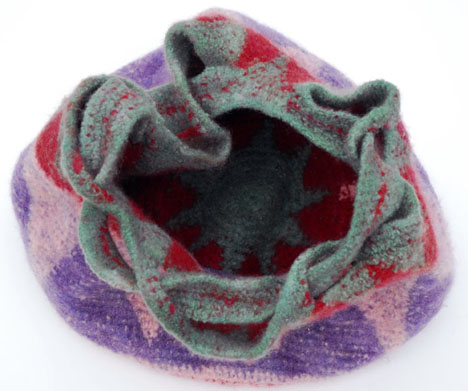
The fabric became very dense after it was felted – no lining necessary.

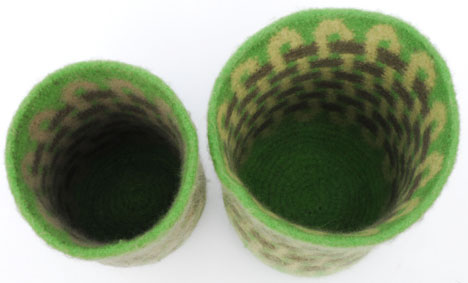
A lining would have hidden the pattern inside the Tapestry Bag.

Fortunately, I’m supposed to get this project back – along with the publication rights. I really like how the carried colors peek through the fabric, giving it a “tweedy” look.

So, what do you think?

Master Bag

January 8th, 2011

I’m one of those people who prefers to sit in a window seat when I’m flying. It really paid off on the flight to the 2007 Crochet Guild of America Conference. When I saw the clouds against the brilliant, blue sky, I snapped a photo and thought, “My next piece will use these colors!”

THIS is why I prefer the window seat.

The bag below that I designed for the Crochet Master Class book is the result. This Beaded Tapestry Crochet Bag project combines my love of basket weaving with bead tapestry crochet. The two different sized beads and the motif trick the eye into thinking it’s looking at a woven surface.

Beaded Tapestry Crochet Bag project in Crochet Master Class book.

The beauty of tapestry crocheting with beads is that each thread can be loaded with one bead color and only the color that is needed at the time is crocheted to form a pattern while the other thread is carried. When crocheting with beads, the bead naturally slides to the back of the stitch, so the back of the stitch is on the outside of the bag. That’s why the graph in the book appears to be reversed.

The inside of the bag is the “working side” since the beads fall to the back of the stitch, so both the inside and outside look great!

This project was tapestry crocheted with three colors, but only one thread was carried while another was crocheted. Since every row only has two colors, ecru or navy was cut off and the other one added close to the end and beginning of each color section.

Detail of the Beaded Tapestry Crochet Bag.

Several years passed before the book was published (not unusual), so I was thrilled when it was finally released! What an honor to be included with such a talented group of designers!

This book is a real masterpiece!

Crochet Master Class is not just a pattern book, but features eighteen crochet techniques. Jean Leinhauser and Rita Weiss, the editors, chose one designer to represent each different approach. We were sent questionnaires, then they put together the biographical, historical, and technical sections that precede each of our projects.

Jean and Rita at the 2009 Crochet Guild of America Conference (photograph by Sherri Bondy).

When I showed Jean and Rita the bag below at the 2007 CGOA Conference, they said it would be perfect for their “master’s level” book. Editors usually shy away from such complicated projects, so I was ecstatic that they were doing a book that would really challenge crocheters!

My first Bead Tapestry Crochet “Woven” Bag.

I later decided to redo the bag, though, with slightly different handles and motifs and with the colors I saw on the flight to the conference. Both of these master’s level bags were made with size 8 and 6 seed beads from Fire Mountain Gems and size 3 DMC 100% cotton Senso thread. As happens so often, this particular DMC thread has been discontinued, but other Senso threads or another size 3 thread could be substituted.

So, if you’re ready to expand your horizons, or would just like to learn more about the many faces of crochet, then Crochet Master Class is for you!

Star Power Update

December 28th, 2010

It’s such a challenge to make a gift for someone that they’ll actually like! What style, fiber, or colors do they prefer? Being so far behind on my holiday gift list, I found myself crocheting the present in front of the recipient (who didn’t realize it was for her, of course).

Carol
Tapestry crocheting an alpaca Star Hat.

As I crocheted, I began to think that since the gift wasn’t finished on time anyway, I might as well ask Betty if she would like a hat like the one I made for Ilsy (who, as promised, managed to act very surprised when she opened the present in front of the family).

Ilsy
Ilsy loves her
Star Hat!

When Betty said, “Yes”, I asked her to to pick out the colors. After careful consideration, she chose black and brown Inca Alpaca. Fortunately, I was able to finish the hat before they flew home.

Betty
Betty really likes her Star Hat, too!

So, what’s the lesson here? To increase the odds that a present will be liked – and maybe even loved – ask if they would like to receive the proposed gift, then let them pick out the colors!

I hope you’re enjoying the holidays and that you’ll have a healthy and happy new year!